
Integrations
Agents work in your own systems: GitLab and GitHub for code, Jira Data Center for issues, any MCP server for the rest, and the model provider of your choice for agents on the server. This page shows how to connect each one, and what agents can and cannot do through it.
- How agents reach your systems
- GitLab and GitHub
- Webhooks for pipelines and reviews
- Jira Data Center
- MCP servers in the Library
- Model connections
- Sign-in with Keycloak
- n8n
How agents reach your systems
Integration tokens stay on the server. An agent never holds them, on a person's computer or on the server:
- Its tools (open a change request, read a pipeline's failures, comment on a Jira issue, call an MCP server) go through the server's MCP gateway, with a token that lives as long as one run.
git cloneandgit pushgo through the server's git proxy, which adds the connection's token on the way to the host.
Each call goes by the agent's tool policy: allowed, asked, or denied. See Approvals and control.
GitLab and GitHub
A connection belongs to a project. It gives the agents of that project access to the repositories under one GitLab group or one GitHub owner, as the account the token belongs to. Only admins manage connections, and a project must exist first (see Projects and tasks).
Prepare a token
Decide which account the agents act as. A bot account and a person's account both work. Whatever the agents do (branches, change requests, comments) shows that account's name on the host.
- GitLab (self-hosted): a token with
apiscope for the group. - GitHub (github.com): a fine-grained token with Contents and Pull requests, read and
write, for the repositories the agents should reach. Leave out Workflows: without it GitHub
refuses a push that changes
.github/workflows, so an agent cannot rewrite what CI runs.
Give the account access only to what the agents need.
Add the connection
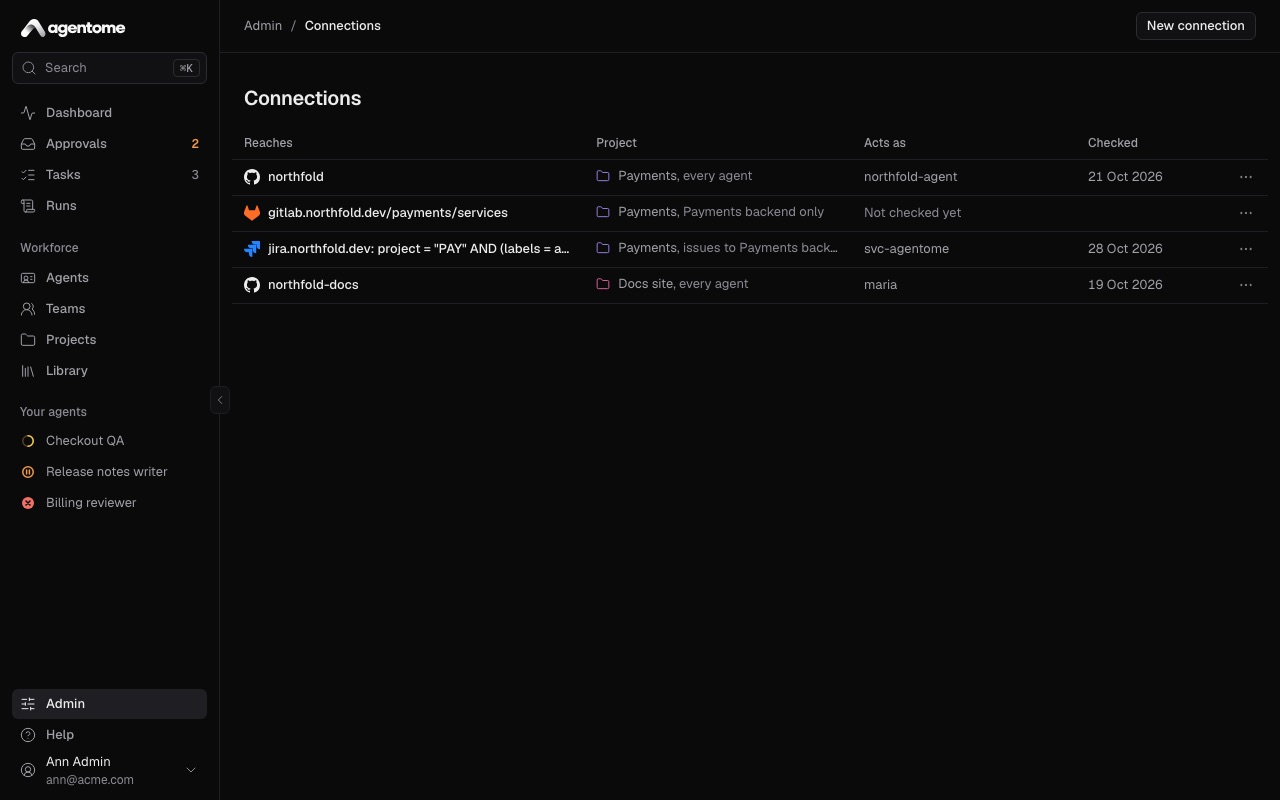
- Go to Admin → Connections and select New connection.
- Under Connect to, pick GitLab or GitHub.
- Pick the Project.
- Under For, keep Every agent of the project, or pick one agent. An agent with a connection of its own acts as that account; the others use the project's.
- For GitLab, fill in the GitLab address, such as
https://gitlab.acme.com, and the Group, such asacme/platform. Subgroups are reached too. For GitHub, fill in the Owner: the user or organization, such asacme. - Paste the Token and select Connect.
The Acts as column shows the account the token belongs to once the token is checked. The row's menu has:
- Check the token, to check it again and refresh the account;
- Webhook settings, for pipelines and reviews (see below);
- Replace the token, when it expires or is rotated;
- Delete connection. Agents of the project without a connection of their own then stop reaching its repositories.
The token is stored encrypted and never shown again.
Cloning and pushing
A run clones the task's repository through the git proxy, on the computer that runs it. The agent commits there and pushes back through the proxy. The proxy enforces four rules, whatever the agent tries:
- It pushes only to branches named
agent/…, such asagent/add-readme. It cannot push tomainor any other branch. - It cannot delete a branch.
- It cannot rewrite history. A push that does is refused, and the agent is told to rebase and push again.
- It cannot change what the pipeline runs. On GitLab that is the CI configuration file and every
file of the repository it includes, the files of child pipelines (
trigger: include) among them; on GitHub the.githubfolder and the local actions its workflows use (uses: ./…). The branch must carry them as the default branch has them now: an agent whose branch started before a person changed them there rebases onto it. A push that changes them is refused, and the agent says in its change request what a person should change.
The proxy checks a push before the branch moves. The commits land first on a ref of its own under
refs/agentome/, on which no pipeline runs; the branch moves to them only once they pass, and the
ref is deleted. So a pipeline never starts on a commit the proxy refused.
The proxy opens only for a run that is still working. When the run ends, is cancelled or reaches its time limit, its access ends with it.
What CI runs for an agent's push
A push to agent/… starts the repository's pipeline, as anyone's push does: that is how Fix failed
pipelines (below) learns the agent's change broke something. The pipeline is the one on your
default branch, but it runs the agent's code: its tests and the scripts its jobs call. So keep CI
secrets out of its reach:
- GitLab: mark every CI/CD variable a pipeline must not hand out Protected, and do not protect
agent/*. Protected variables reach only pipelines of protected branches and tags. - GitHub: keep deployment secrets in environments whose deployment branches are
mainor your release branches, not in repository secrets, which every workflow of every branch reads. With the token above, the agent cannot change the workflows themselves.
Change requests
When its work is ready, the agent opens a change request: a merge request on GitLab, a pull request on GitHub. It may open it as a draft.
Open a change request asks the owner first by default. The request waits in Approvals with the title and description the agent wrote, and opens only when you approve it. You can change that in the agent's Tools & policies.
The change request is linked on the task, with its state and its pipeline. With webhooks set up (see below), the task follows it: when the change request is merged, the task is done.
The agent can also read a change request and its review, read a pipeline's failures, and reply on a change request. Each is a tool with its own policy.
Webhooks for pipelines and reviews
Webhooks tell Agentome when a change request or its pipeline changes. Without them, the task does not learn that its change request was merged or its pipeline failed.
- In Admin → Connections, open the connection's menu and select Webhook settings.
- Copy the Payload URL and the Secret. The URL has the form
https://<your server>/webhooks/gitlab/<connection>or.../webhooks/github/<connection>. - Add a webhook on the host with them.
On GitLab, in each repository's settings under Webhooks, or once in the group's settings where your GitLab edition has group webhooks:
- URL: the Payload URL.
- Secret token: the Secret.
- Triggers: merge request events, pipeline events and comments.
On GitHub, in the organization's or the repository's settings, under Webhooks:
- Payload URL: the Payload URL.
- Content type:
application/json. - Secret: the Secret.
- Events: pull requests, pull request reviews, check suites and workflow runs.
The host must reach your Agentome server at its public address.
What a project does with them
On the project page, When something happens has three settings:
- Fix failed pipelines: when the pipeline of an agent's change request fails, the agent runs its task again to fix it.
- Address review comments: when someone asks for changes on an agent's change request, or comments on it, the agent runs its task again.
- Review people's change requests: a change request a person opens becomes a review task for the agent you pick. It reads the change and leaves its review as comments, and pushes nothing.
A webhook starts at most three runs a day for one task, and only within the budgets.
Jira Data Center
A Jira connection turns the issues of a Jira project into tasks of an agent or of the project's team, and moves the issues as the work goes. Agentome polls Jira, so there is nothing to set up on the Jira side. Jira Data Center 10 or newer is supported.
Prepare a token
Make a personal access token for the account that may see, move and comment on the issues. Agentome moves issues and comments as that account.
Add the connection
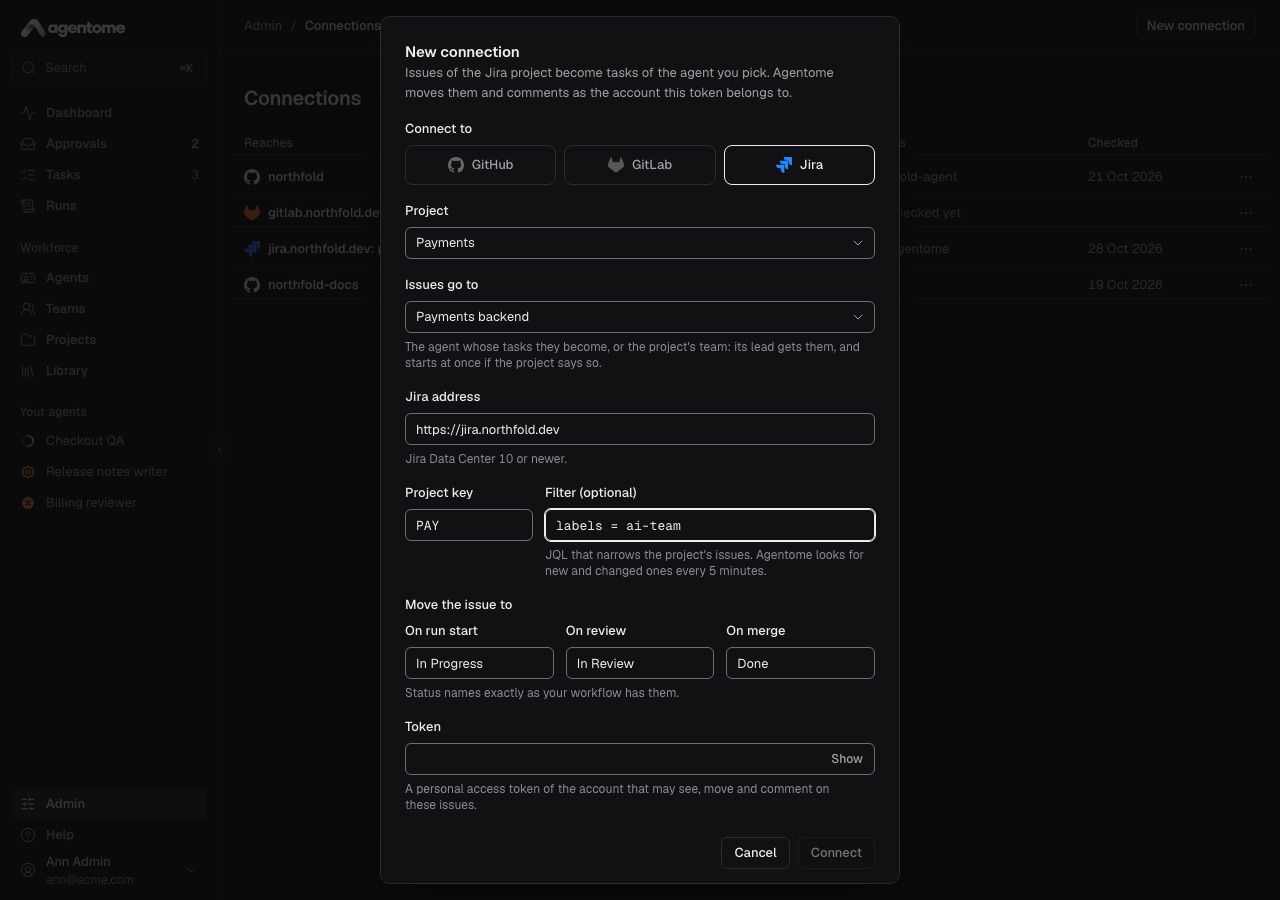
- Go to Admin → Connections and select New connection.
- Under Connect to, pick Jira.
- Pick the Project.
- Under Issues go to, pick an agent, or The project's team: its lead gets the issues and splits them, and starts at once if the project says so.
- Fill in the Jira address, such as
https://jira.acme.com, and the Project key, such asPAY. - Optionally, fill in Filter (optional) with JQL that narrows the project's issues, such as
labels = ai-team. Only issues that match become tasks. - Under Move the issue to, give the status names of your workflow for On run start, On review and On merge. The defaults are In Progress, In Review and Done. Use the names exactly as your workflow has them.
- Paste the Token and select Connect.
An issue's summary and description reach the agent as data, not as its task: the run is told to do the work the issue describes, with the issue's words in a marked block that it is told not to obey. That makes a planted instruction much less likely to work, not impossible. When the project's lead starts on new issues at once, anyone who can file an issue in the filter starts a run: keep the tools that write outside on Ask for such an agent, or let a person start each task.
How issues and tasks follow each other
- Every 5 minutes Agentome looks for new and changed issues under the filter. Sync issues now in the connection's menu does not wait. An admin can change the interval (see Server settings).
- A new issue becomes a task, in the project's main repository. When the issue changes, the task's title and description follow.
- When a run starts, the issue moves to the On run start status.
- When the agent opens a change request, it is linked on the issue, and the issue moves to the On review status.
- When the change request is merged, the issue moves to the On merge status.
- When a run ends, its summary becomes a comment on the issue.
The agent can also read the issue and comment on it during a run. Comment on the Jira issue asks the owner first by default.
If Jira refuses a step, the task shows the error, and later steps try again.
MCP servers in the Library
Any remote MCP server can give agents more tools: a tracker, a wiki, a database. You add it once to the Library, then give it to agents.
Add a server
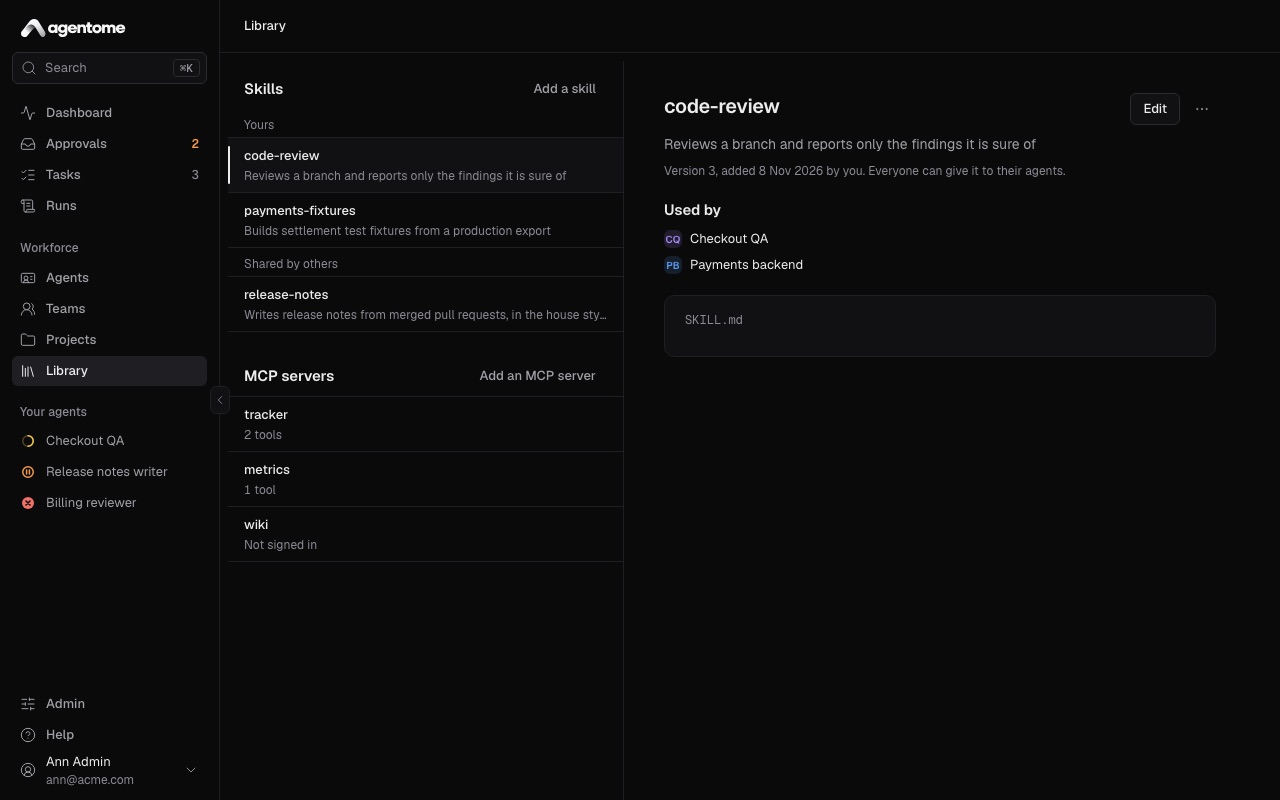
- Open Library and select Add an MCP server.
- Fill in the Name, in lowercase, such as
tracker. Its tools reach the agent astracker__<tool>. - Fill in the Address of the server, such as
https://mcp.acme.com/mcp. It must be a remote server over streamable HTTP. - Under Sign-in, pick one:
- A token: paste it in Token. Agentome sends it as
Authorization: Bearerand the token. Another scheme, such as Basic, can be typed whole. The token is optional. - OAuth in the browser: each person signs in with their own account.
- A token: paste it in Token. Agentome sends it as
- Describe What it does, so others know when to use it.
- Select Add server, or Add and sign in for OAuth.
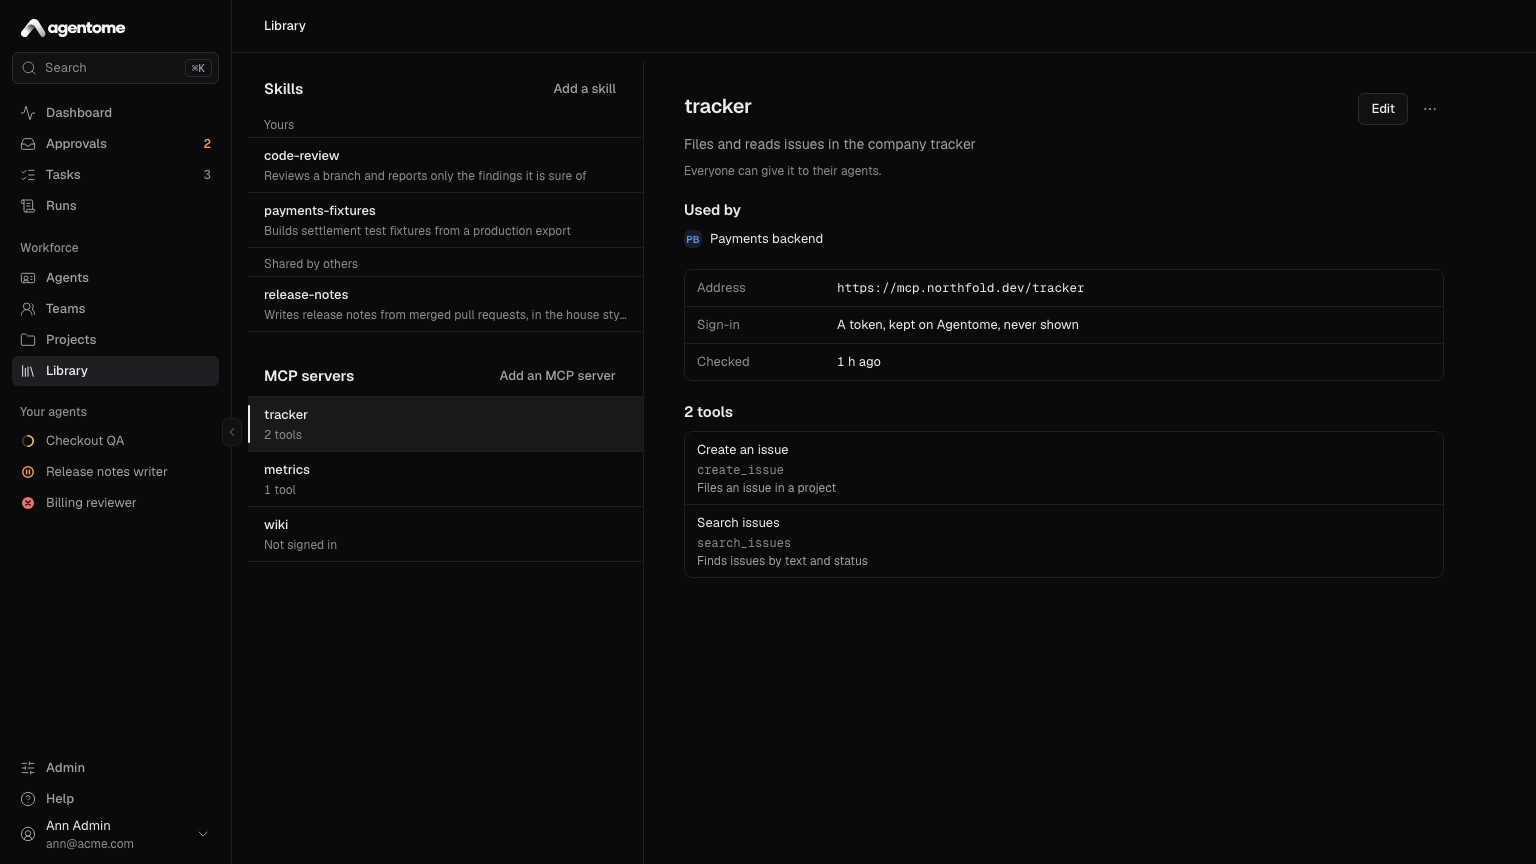
Agentome checks the server and lists its tools.
Secrets stay on the server
A server's token is kept on the Agentome server, encrypted, and is not shown again. It never reaches a person's computer: an agent calls the server's tools through the MCP gateway, which adds the token.
Share it and give it to agents
A new server can be used only by the person who added it. An admin can select Share with everyone in its menu, and then everyone can give it to their agents.
To give a server to an agent, open the agent's Tools & policies and pick it in Add an MCP server. Its tools then appear under its name, and each asks first until you set it otherwise.
The server's menu also has Check again, to read its tools again after it changed, and Delete.
OAuth sign-in per person
With OAuth in the browser, each person signs in once with Sign in on the server's page in the Library, and their agents use their account. A person who has not signed in sees Not signed in, and the server lists its tools after they sign in.
Sign-ins are personal. When an agent passes to another owner, the new owner signs in again to the servers it uses.
The server's authorization server must accept Agentome's return address. If the sign-in stops at
once with invalid_request, see
MCP servers that sign in with OAuth.
Model connections
Agents on people's computers run under their owner's own Claude or ChatGPT subscription, and need no model connection. An agent that works on the server, by itself, needs one: an API key that the company pays for.
Add a connection
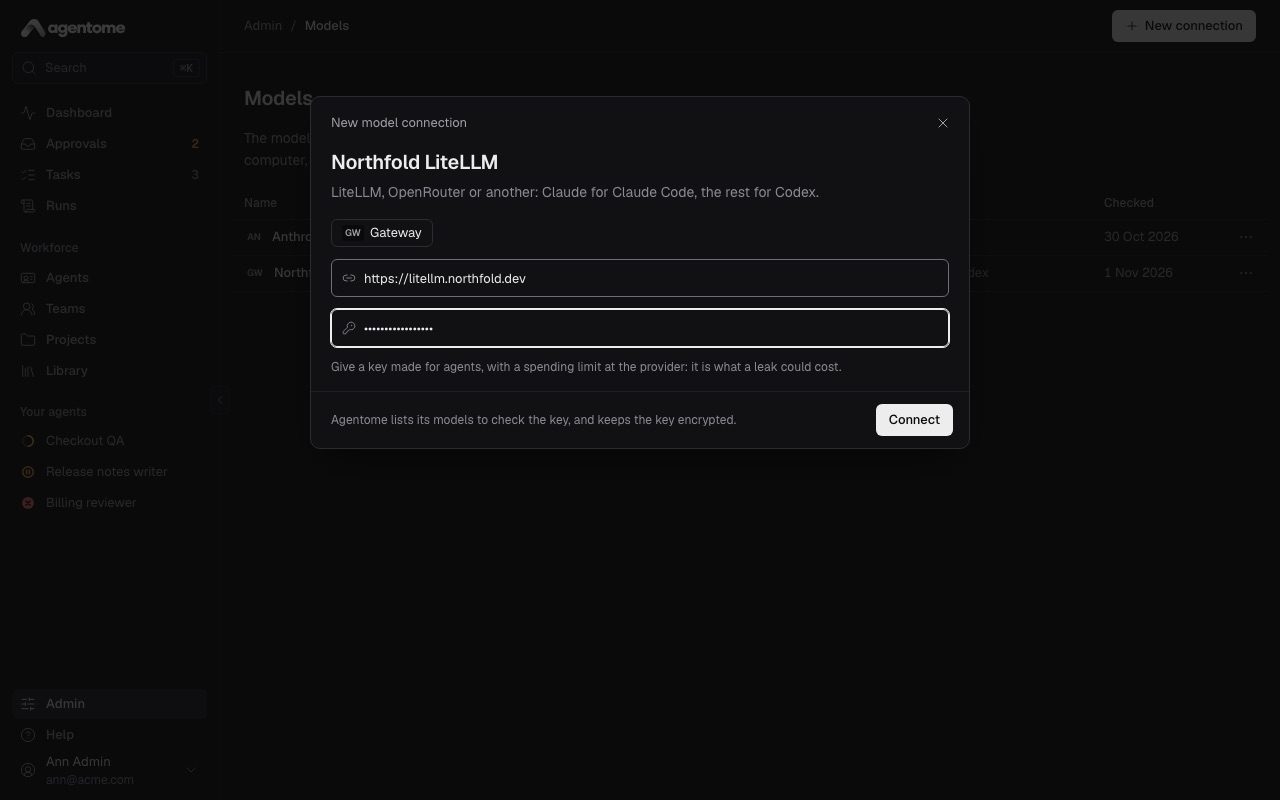
- Go to Admin → Models and select New connection.
- Give it a name.
- Pick the kind:
- Anthropic: Claude models, for Claude Code.
- OpenAI: GPT models, for Codex.
- Gateway: a gateway such as LiteLLM: Claude models for Claude Code, the rest for Codex. Fill
in its address, such as
https://litellm.acme.com.
- Paste the API key. Use a key made for agents, with a spending limit at the provider: it is what a leak could cost.
- Select Connect. Agentome lists the connection's models to check the key, and keeps the key encrypted.
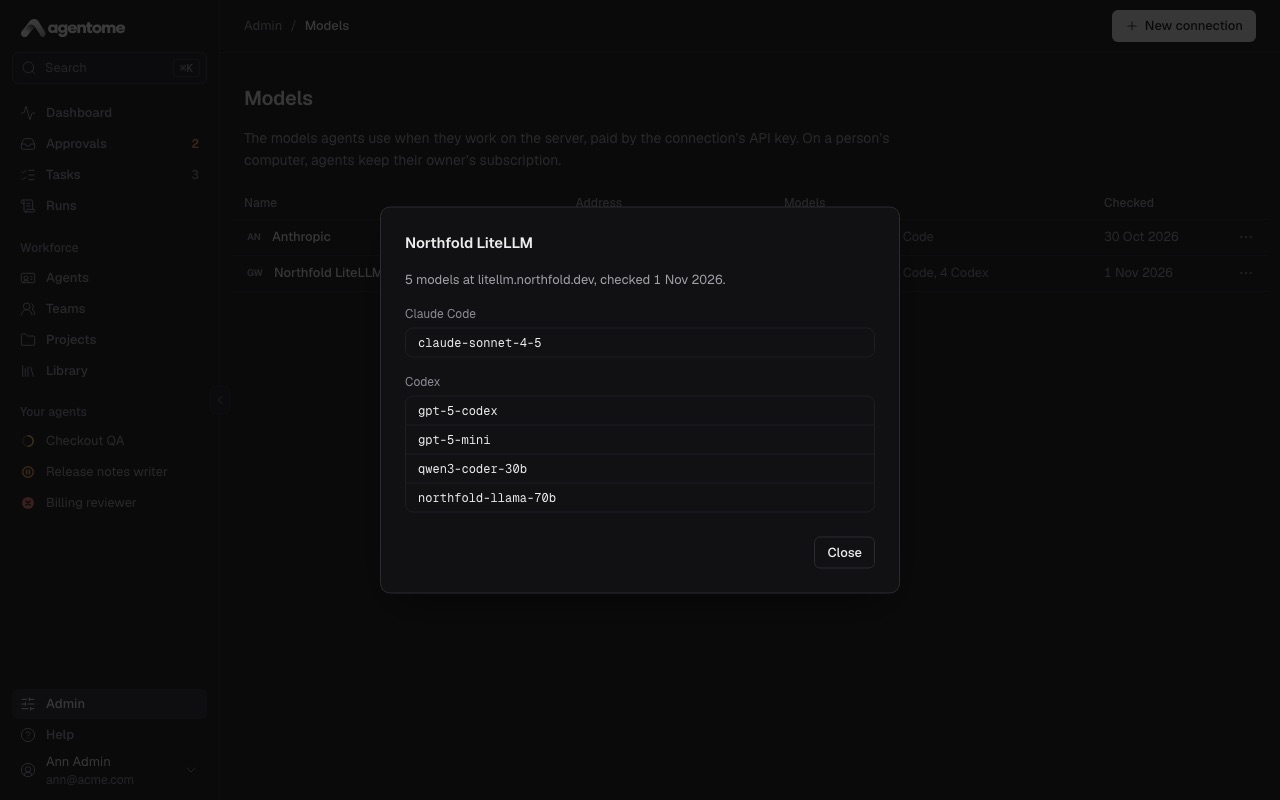
The row's menu has Models, the models the connection offers by engine, Check now, Edit and Delete. Deleting a connection erases its key, and agents on its models cannot work on the server until they get another one.
Put an agent on the server
Needs a license key.
In the agent's Engine & model section:
- Under Where it works, pick By itself.
- Pick the Model connection and the Model.
The server needs a seat that runs the agents. An admin starts it once; see Agents on the server and Computers.
Sign-in with Keycloak
Needs a license key.
People can sign in with the company's Keycloak, beside their passwords. An admin creates a client for Agentome in the realm and sets three settings on the server; see Keycloak.
Once it is on:
- The sign-in page offers Sign in with Keycloak.
- Anyone the realm lets in gets an account on their first sign-in, as a member. Who may come in is the realm's to say.
- A disabled person stays out, whatever the realm says.
- Sign-in with a password stays, so an admin can still get in when Keycloak is down.
Without a license key, people sign in with their passwords.
n8n
The community node n8n-nodes-agentome lets an n8n workflow give an agent a task when something happens elsewhere, wait for its result, decide what the agent asks to approve, and start when a run ends or an approval waits.
- In n8n, open Settings → Community nodes → Install, enter
n8n-nodes-agentomeand confirm. - In Agentome, make a personal API token: open the menu under your name and choose API tokens. The nodes act as you; a Read only token can only read.
- In n8n, add an Agentome API credential with your server's address and the token.
The node's README lists its operations.