
Getting started
This page takes you from nothing to a first finished task: you install Agentome, create the administrator, give agents a place to run, create an agent, put it on a project, file a task, watch the run and review what came back. It takes about half an hour.
The words used here, such as run, seat and policy, are explained in Concepts.
Before you start
You need:
- A Linux or macOS machine in your network with Docker Engine 26 or newer and the Docker Compose
plugin (
docker compose versionanswers). This machine runs the Agentome server. - One of these, for the agents to run on:
- a work machine with Node.js 20 or later and Claude Code installed and signed in with your Claude subscription, or
- an Anthropic or OpenAI API key, or the address and key of a gateway such as LiteLLM, for agents that work on the server. Needs a license key.
Everything in this guide works on Free, without a license key, unless a step says otherwise.
1. Install the server
Pick one of the ways.
With the install script. On the server machine, run:
curl -fsSL https://agentome.ai/install.sh | shThe script asks three things: the folder for the server (./agentome), the domain people open
(for HTTPS with a Let's Encrypt certificate; Enter keeps the server on this machine only), and
whether people's agents run here, in places on the server. With places, it turns gVisor on when
Docker has it. It then downloads the release's compose.yaml, writes .env, pulls the images
from Docker Hub and starts everything. When the server is healthy it prints a line like this:
Agentome is running. Open http://localhost:3000/setup to create the administrator, with the setup code <code>The script also puts an agentome command on the machine (in ~/.local/bin, or
/usr/local/bin for root), which runs this server from any folder: agentome status,
agentome update, agentome backup, agentome logs, agentome setup-code;
agentome help lists them all.
Without a terminal, give the answers as flags:
curl -fsSL https://agentome.ai/install.sh | sh -s -- --domain agentome.example.com --places
curl -fsSL https://agentome.ai/install.sh | sh -s -- --helpKeep the setup code for step 2.
With Node.js. On a machine with Node.js 20 or later, the agentome package on npm asks the
same questions and installs the same release:
npx agentome installIt does not turn gVisor on for places or put the agentome command on the machine: use the script
for a server with places, or install the package with npm install -g agentome to have the
command.
From a checkout. If the machine cannot reach Docker Hub, or you want to build from source:
git clone https://github.com/agentome-ai/agentome.git
cd agentome
docker compose up -d --build
docker compose exec app agentome setup-codeThe last command prints the setup code. The server answers at http://localhost:3000.
If people will reach the server by any other address than http://localhost:3000, set
AGENTOME_PUBLIC_URL in .env before you go on, then run docker compose up -d. To connect other
people's computers you also need HTTPS: see
HTTPS with the proxy profile. All
settings are listed in CONFIG.md.
2. Run the first-run setup
- Open
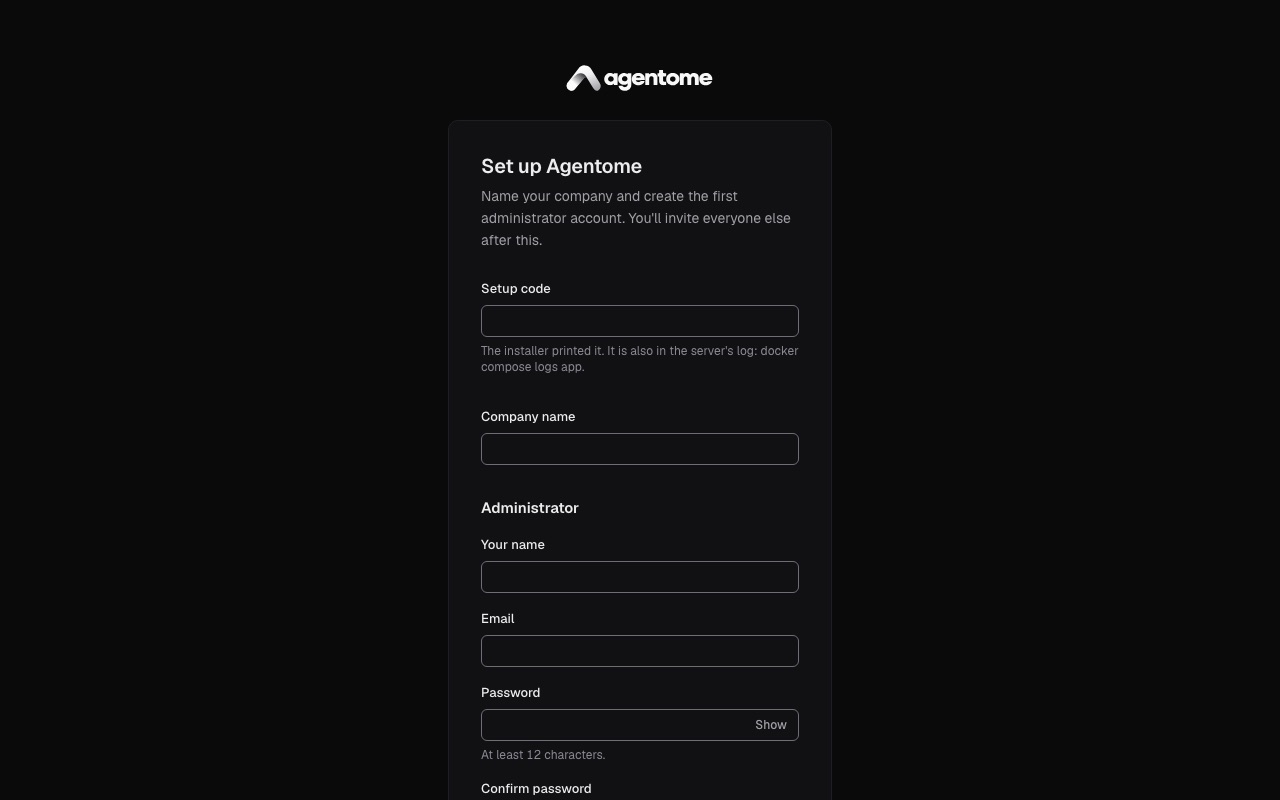
/setupon the server's address, for examplehttp://localhost:3000/setup. - In Setup code, paste the code from step 1. If you lost it, run
docker compose exec app agentome setup-codein the folder that holdscompose.yaml, or look in the server's log withdocker compose logs app. - In Company name, enter your company's name, such as Acme.
- Under Administrator, fill in Your name, Email, Password (at least 12 characters) and Confirm password.
- Click Create the administrator account.
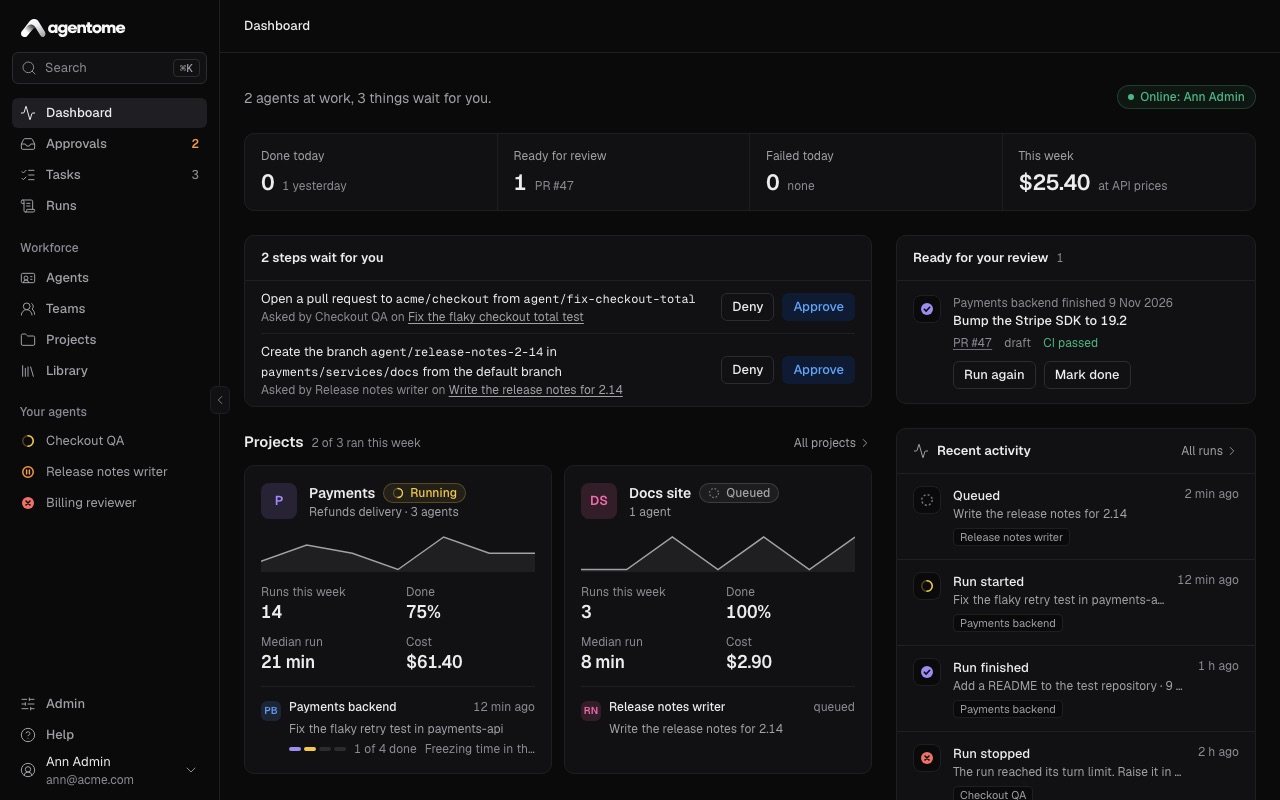
You are signed in as the first administrator and land on the Dashboard. The sidebar holds the
work (Dashboard, Approvals, Tasks, Runs) and, under Workforce, Agents,
Teams, Projects and Library. Admin and Help are at its foot. Press ⌘K
(Ctrl K on Windows and Linux) anywhere to jump to a page.
To bring in colleagues, open Admin → People, click Invite someone and send them the invitation link. More in Administration.
3. Give agents a place to run
An agent needs somewhere to run. Choose one:
- Your place on the server (option A). The platform makes you a container on the company's server, and your agents run in it under your own Claude subscription while you are at work in Agentome. Nothing is installed on your computer. This is the usual way for a company.
- Your computer (option B). The agent runs on your work machine under your own Claude subscription, only while you are at the computer. Suits a small team without a server.
- By itself, on the server (option C). The agent runs on a server seat with a model connection's API key, with nobody at work. Needs a license key.
Option A: make your place on the server
- Turn places on, once, on the server machine: in the folder that holds
compose.yaml, putAGENTOME_PLACE_LAUNCHER_URL=http://place-launcher:8080in.envand rundocker compose --profile places up -d. On Kubernetes, take theplacescomponent ofdeploy/kubernetes. More in Places on the server. - In Agentome, open Admin → Computers. Under Your place on the server, click Make my place. It takes a minute the first time, while the place installs Claude Code.
- Click Open terminal. In the terminal, run
claudeand sign in with your Claude subscription: open the link it shows in your browser, then paste the code back. For Codex, runcodex login --device-authand enter its code in your browser. - Close the terminal. Your agents now run in your place whenever you have Agentome open and in use.
Option B: connect your computer
On the computer you want to connect, check that Claude Code is installed and signed in: run
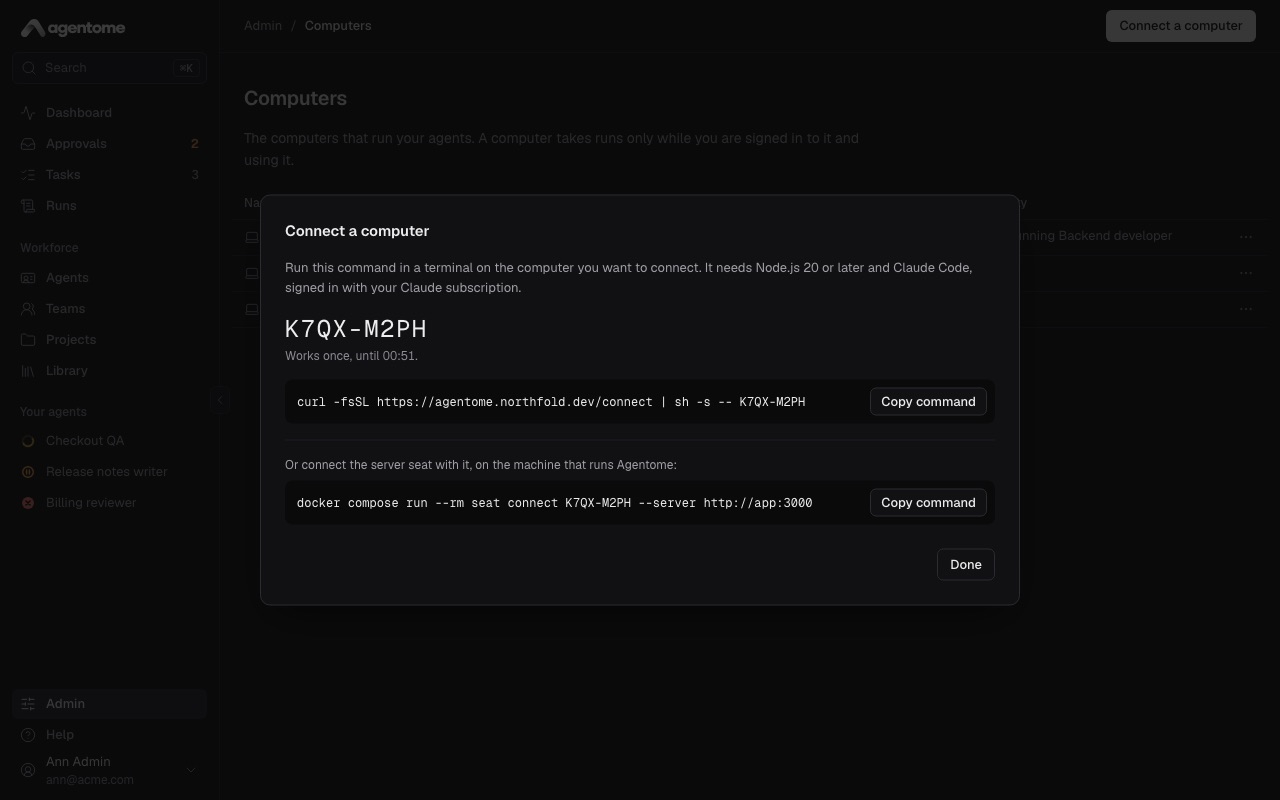
claude, and sign in with your Claude subscription if it asks. Node.js 20 or later must be installed too (node -v).In Agentome, open Admin → Computers and click Connect a computer.
The dialog shows a one-time code and a command. Click Copy command. The code works once, for ten minutes; the dialog says until when.
Paste the command into a terminal on your computer and run it. It looks like this:
curl -fsSL https://agentome.example.com/connect | sh -s -- K7QX-M2PHThe script checks for Node.js and Claude Code, downloads the worker into
~/.agentome/bin, checks it against its checksum, connects the computer and starts the worker as a background service of your login session.Click Done in the dialog. Your computer appears in the list as Online, with Ready for runs under Activity.
If the server runs from source with pnpm dev, the command is a pnpm command instead and the
dialog says Run it in a checkout of the repository. Everything about computers, including what
to do when a computer shows Offline or Claude Code is not signed in, is in
Where agents run.
Option C: add a model connection for agents on the server
Needs a license key. An admin pastes one in Admin → License.
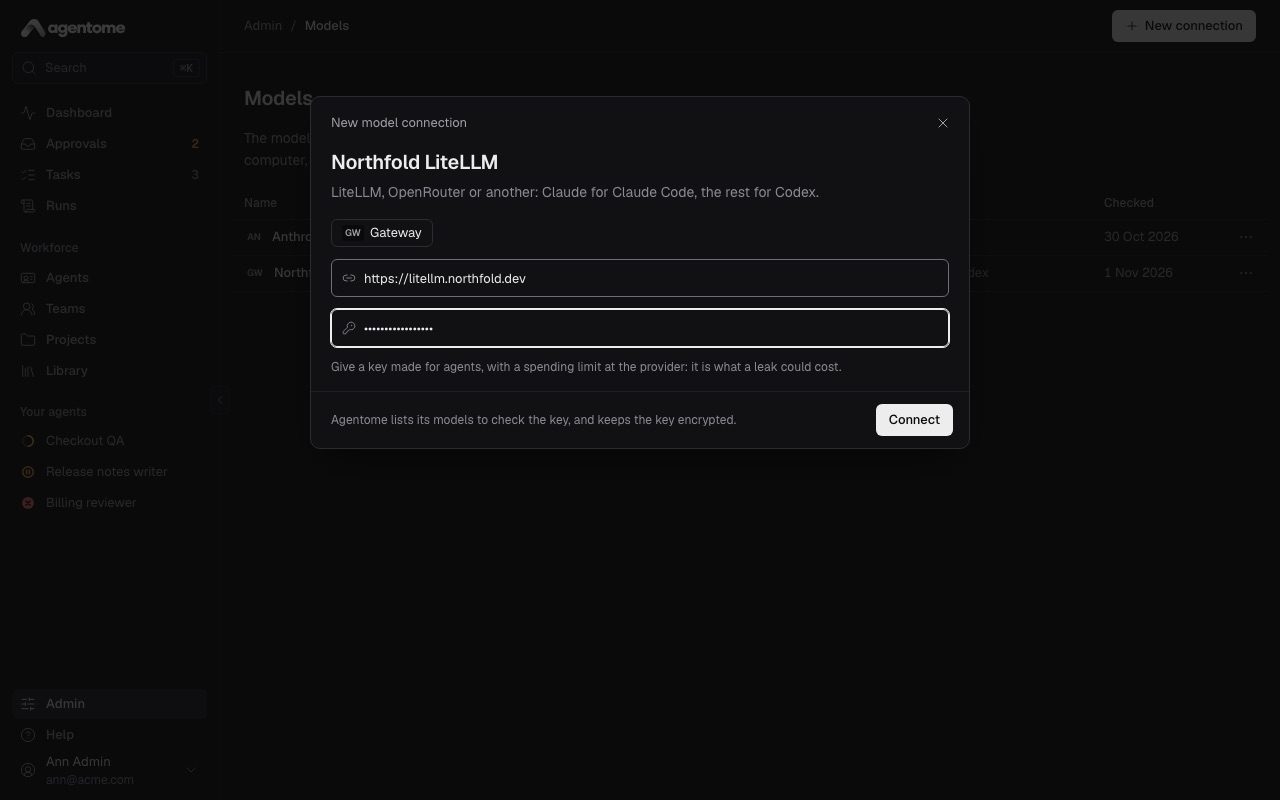
Open Admin → Models and click New connection.
Enter a name, such as "Anthropic for agents".
Pick the kind: Anthropic (Claude models, for Claude Code), OpenAI (GPT models, for Codex) or Gateway (LiteLLM, OpenRouter or another). For a gateway, enter its address.
Paste the API key. Use a key made for agents, with a spending limit at the provider.
Click Connect. Agentome lists the connection's models to check the key, and keeps the key encrypted.
Start the server seat. Open Admin → Computers, click Connect a computer, and copy the second command, under Or connect the server seat with it. On the server machine, in the folder that holds
compose.yaml, run it and then start the seat:docker compose run --rm seat connect <code> --server http://app:3000 docker compose --profile server-seat up -d
The details, including the seat's first start and its limits, are in The server seat.
4. Create a project
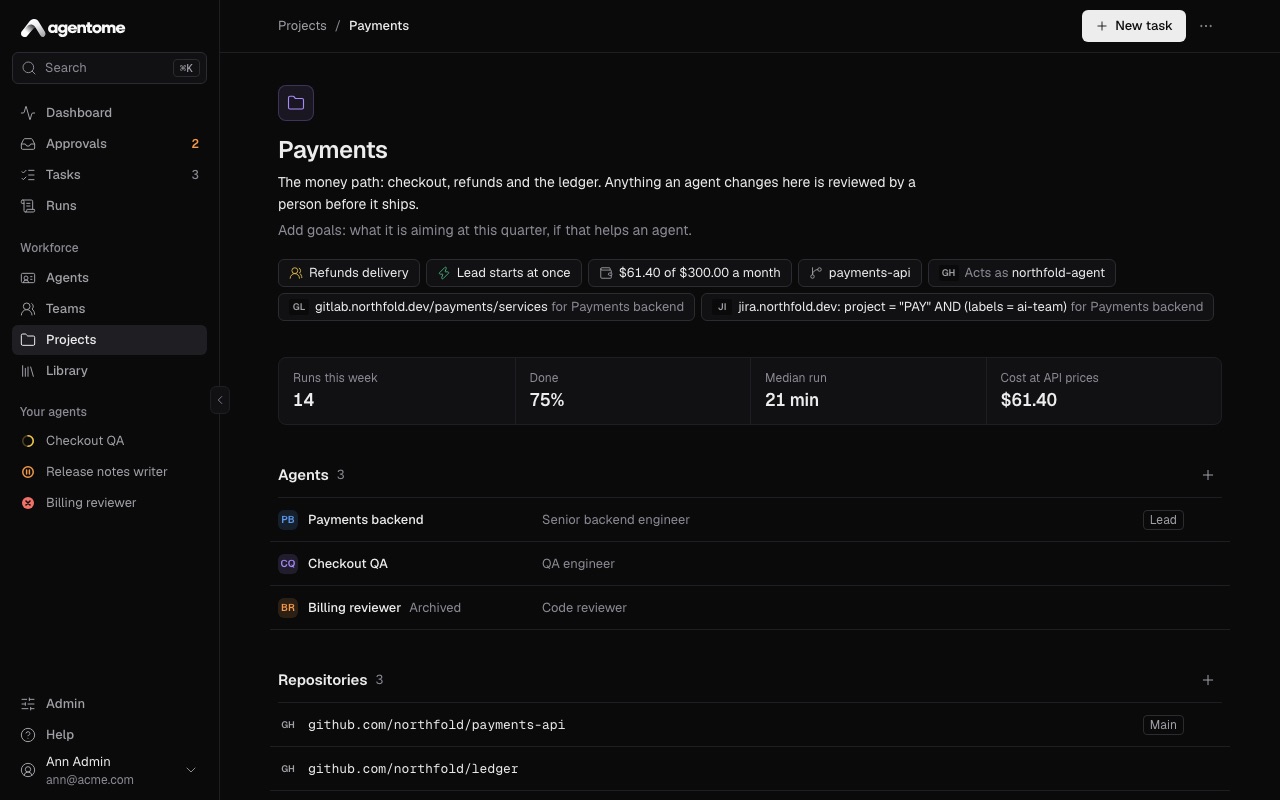
Every task is filed in a project. Any signed-in person can create one; its maker and the admins can change it.
- Open Projects and click New project.
- Name it after the work, not the repository, such as "Payments".
- Click Create project. The project's page opens.
On that page you can add a Description and Goals, which agents read with each task. Repositories are optional for a first task:
- Without a repository, a task can work in a folder on your computer, or in a new, empty folder each run. Step 7 shows both.
- To work in a GitHub or GitLab repository, an admin connects the project to the code host in Admin → Connections, then adds the repository in the project's Repositories section. See Projects and tasks and Integrations.
5. Create an agent
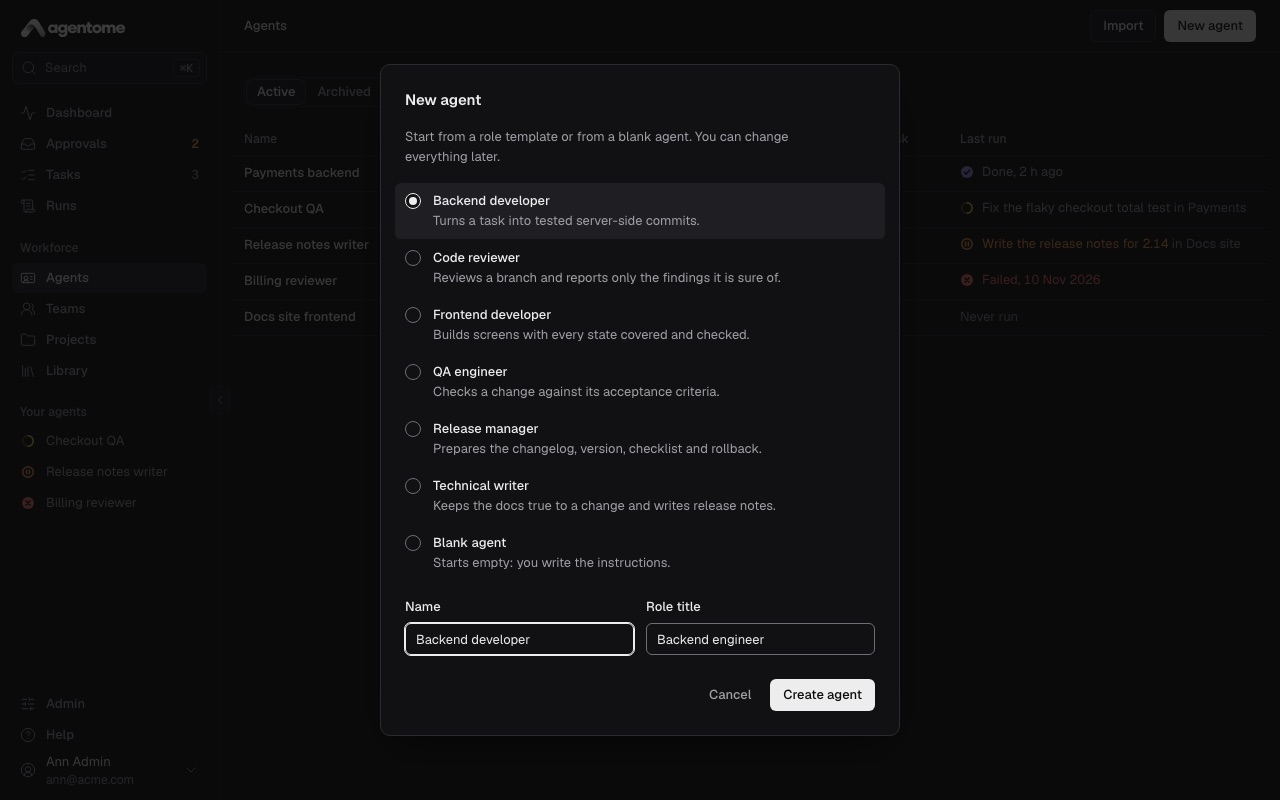
- Open Agents and click New agent.
- Pick a role template, or Blank agent to write the instructions yourself.
- Check the Name and Role title, such as "Payments backend" and "Backend developer".
- Click Create agent. The agent's editor opens.
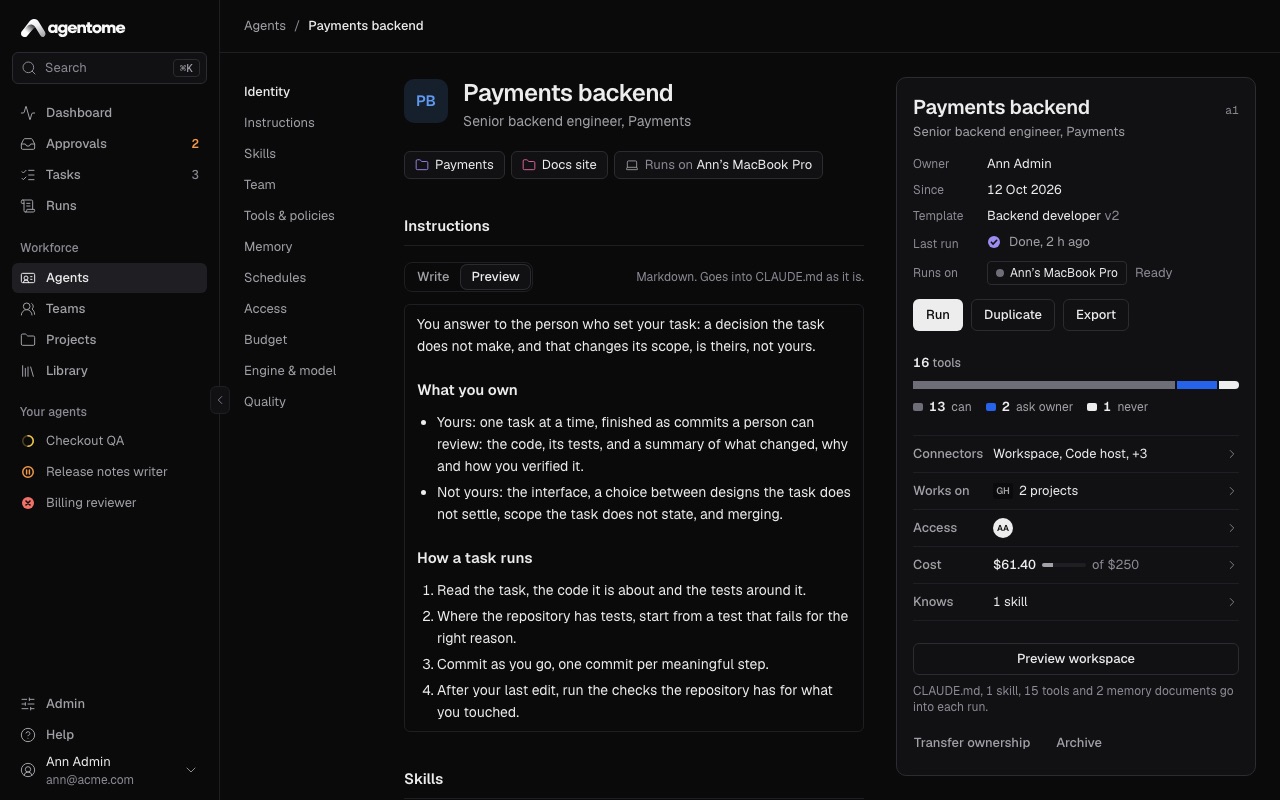
The editor is one page: its sections are listed on the left, and the agent's sheet, a summary of what it is, stays on the right. For a first task, look at three sections:
- Instructions. What the agent is and how it works. A template fills this in; change it to suit your team.
- Tools & policies. For each tool the agent can call, choose Allow, Ask or Deny. Ask holds the call in Approvals until you approve it. Auto allows every tool and Manual asks for every tool, except the ones you deny. Policies save as you change them.
- Engine & model. Pick the Engine, Claude Code or Codex, and under Where it works pick With its owner or By itself. With its owner, leave Model on Default to let the engine choose. By itself, pick a Model connection and a Model; the By itself choice needs a license key and a model connection.
Click Save changes at the top when you are done. The other sections, such as Skills, Memory and Budget, are described in Agents.
6. Put the agent on the project
Only a project's agents work on its tasks.
- Open Projects and then your project.
- In the Agents section, click the add button and pick your agent from the list (Add agent).
The agent is listed under Agents, and its sheet in the editor shows the project under Works on. You can put only your own agents on a project you made; an admin can put any agent on any project.
7. File a first task
- Open Tasks and click New task.
- Write a Task title, such as "Add a health check endpoint".
- Describe what to do below it. The description is Markdown and goes to the agent as it is.
- Under the description, choose:
- the project, in Choose a project;
- the agent, in Choose an agent or a team;
- where it works. The chip opens a list: a repository of the project, a folder On your
computer (type its path, such as
~/code/app), or No repository, which gives the run a new empty folder each time.
- Leave Run now on. The line next to it says where the run goes, such as "Runs on Ann's MacBook now", or that it waits for a computer.
- Click Create and run. Press
⌘↵(Ctrl Enter) to do the same from the keyboard.
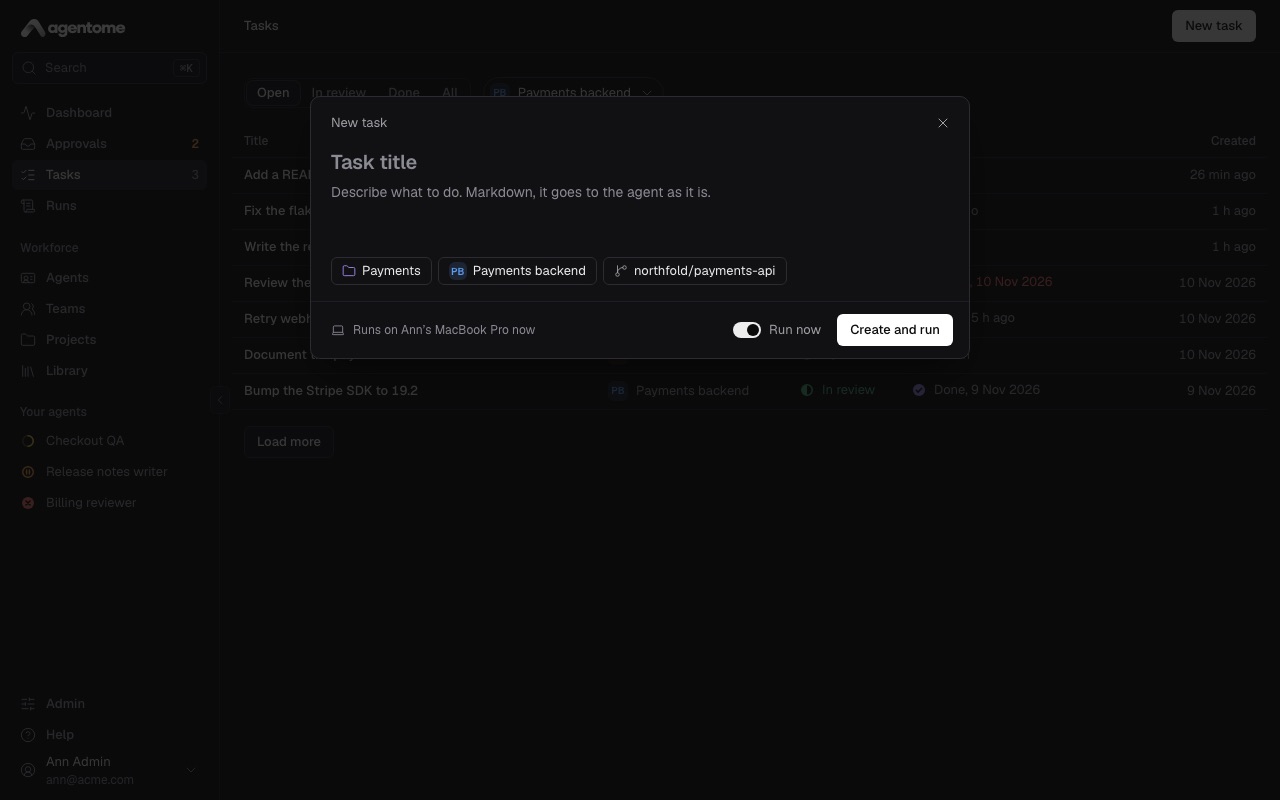
With Run now off, the button reads Create task, and the task waits until you click Run on its page.
8. Watch the run
After Create and run, the run's page opens and follows the run live.
- At the top: the Agent, the Task, who ran it (Ran by), who started it and when.
- Plan: the agent's steps as it works through them, with how many are done.
- Transcript: every message and tool call. Click Transcript to fold or unfold it.
- On the right, Results: the branch, the report and the cost appear here when the run ends.
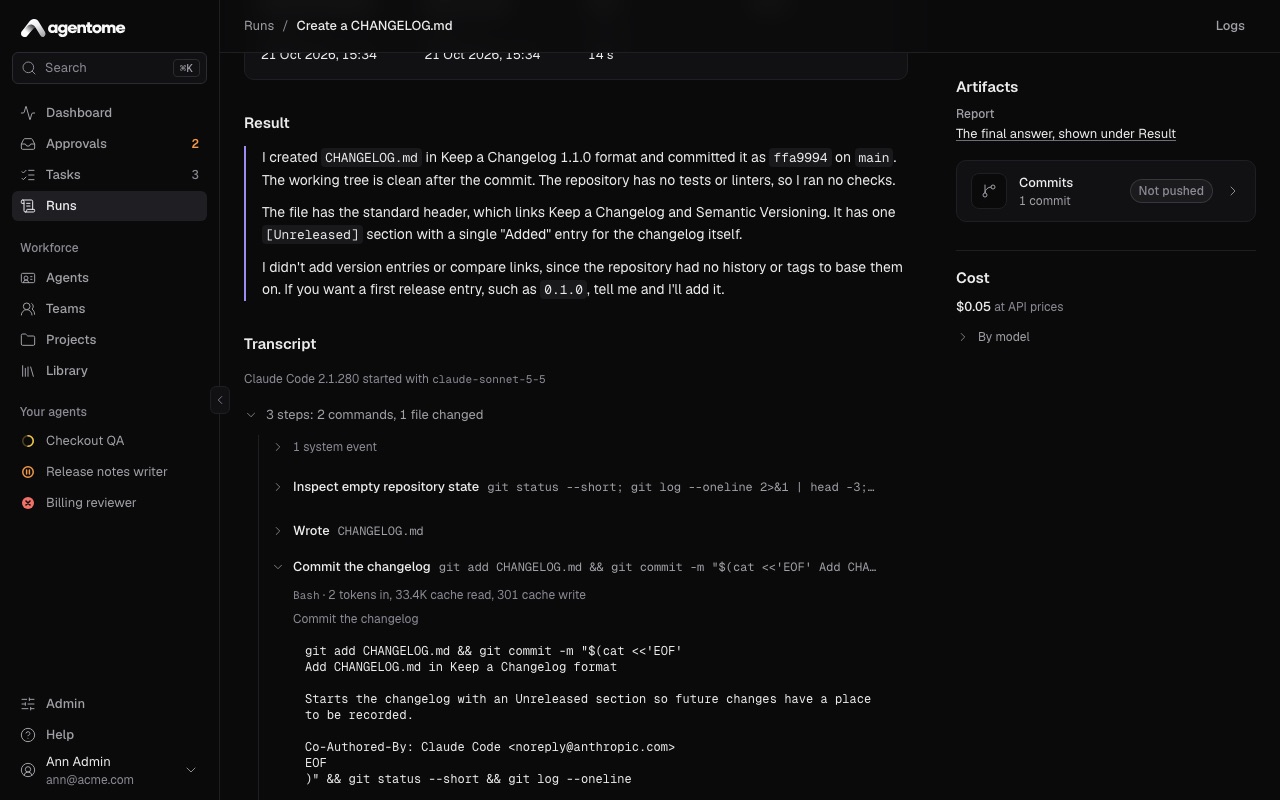
While the run is queued, the transcript says "Waiting for a computer to pick this run up." It starts when your computer, or the server seat, takes it.
If a tool call needs your approval, the run shows Waiting for you with Approve, and the call also waits in Approvals in the sidebar. Open it, read what the agent wants to do and click Approve or Deny. More in Approvals and control.
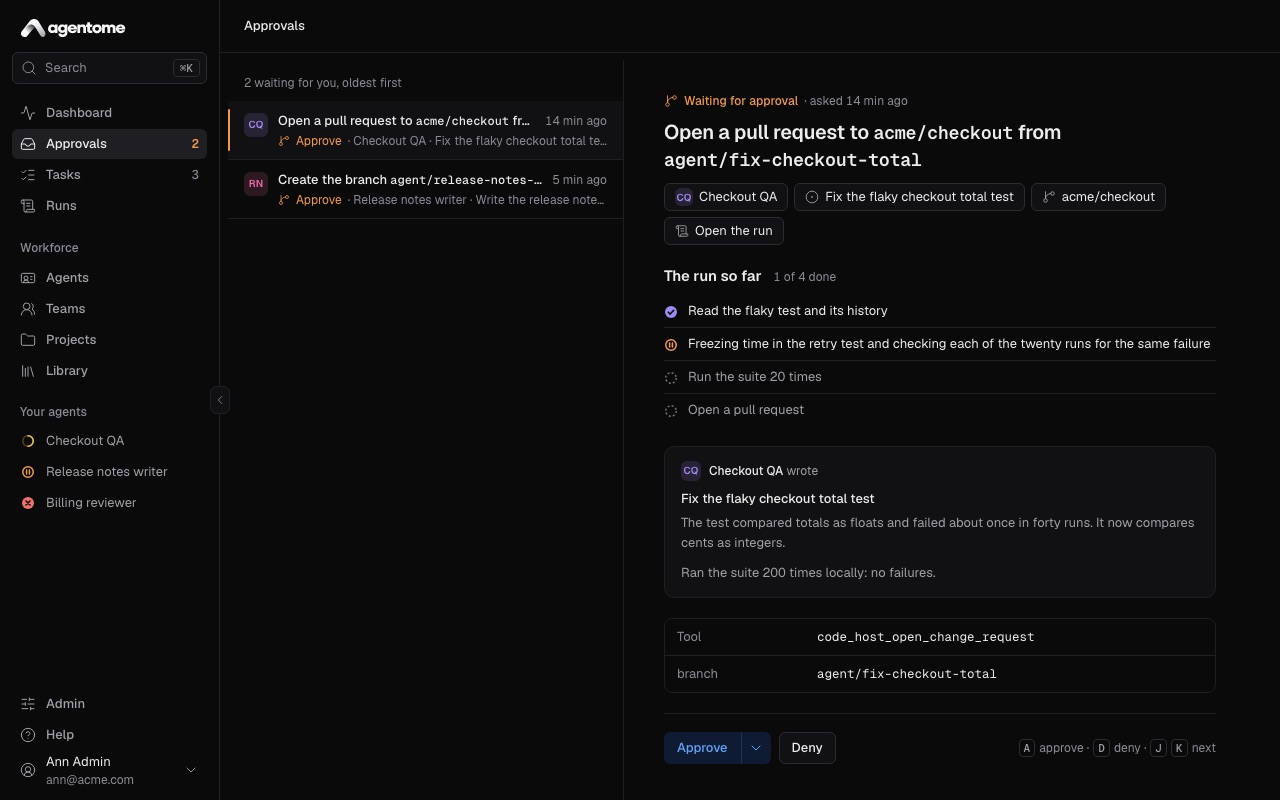
To stop a run, click Cancel run and confirm. What the run did so far stays in the transcript.
9. Review the result
When the run ends as Done, its page leads with the agent's answer, and the right column lists the Artifacts: a Report, a Branch and, when the agent opened one, a Merge or pull request. Cost shows what the run cost, By model.
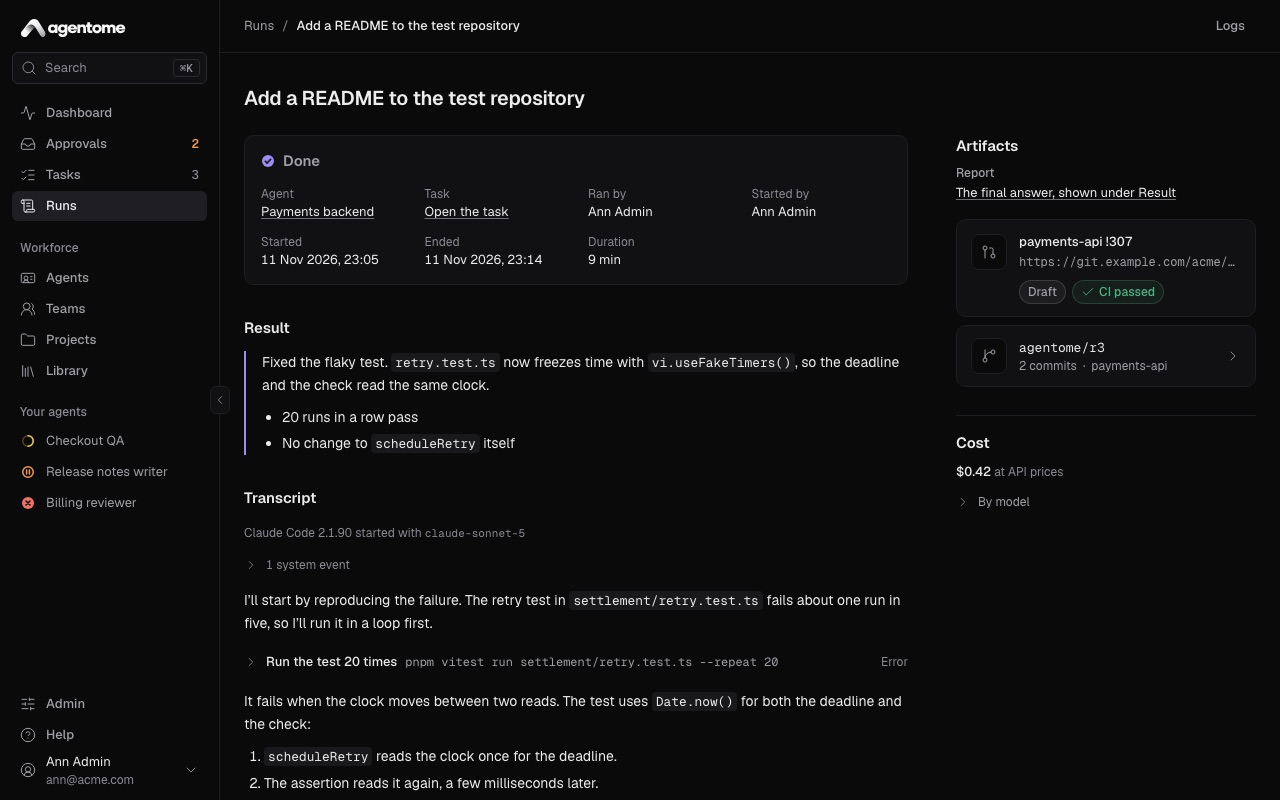
The task moves to In review, and the Dashboard lists it under Ready for your review. Open the task (the Task link on the run, or Tasks, tab In review):
- Read the report and look at the changes. If the task worked in a folder on your computer, the
agent's commits are in that repository as a new branch,
agentome/<run id>; your own branches are left as they were. - If it is what you wanted, click Mark as done.
- If not, write to the agent in the comment field at the bottom ("Write to Payments backend: what to change, what you found") and click Comment and run. The next run reads your comment. Comment alone saves it for the next run, and Run again starts one without a comment.
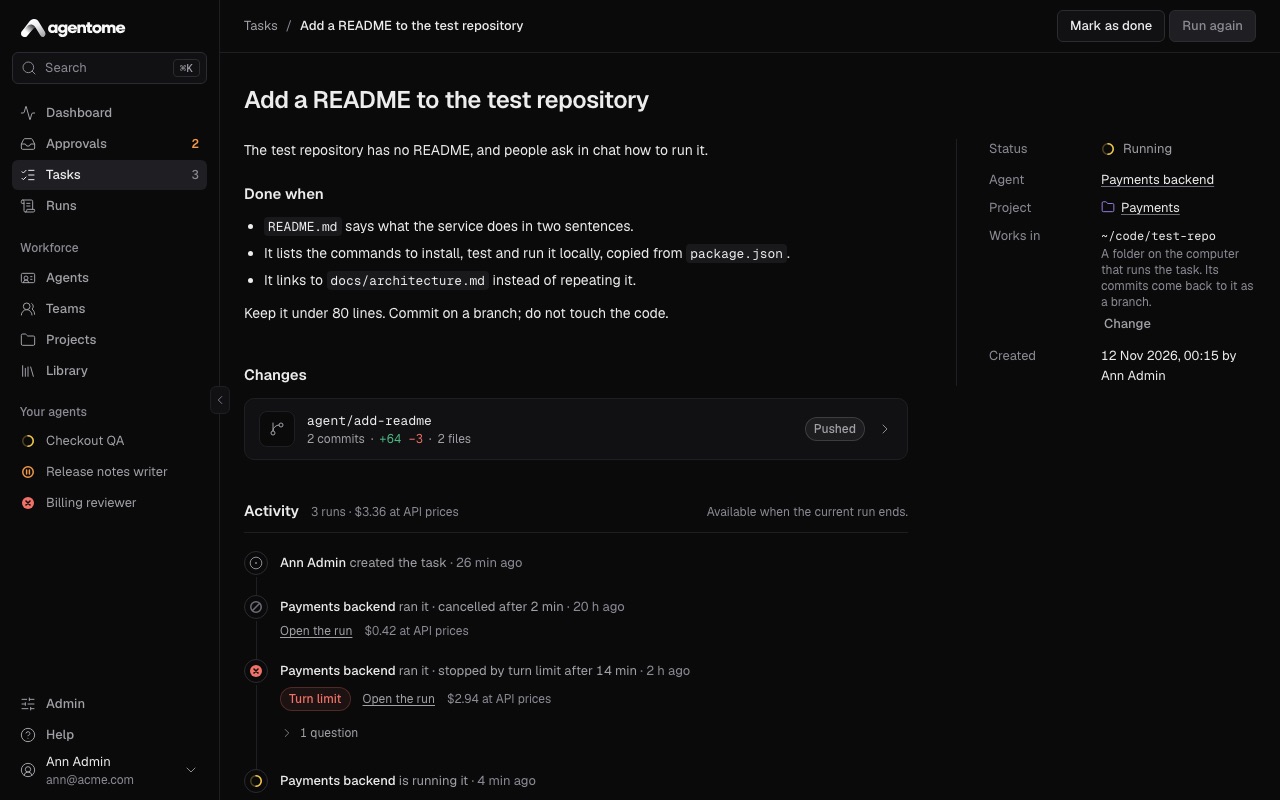
That is your first finished task.
Where to go next
- Concepts: the words of the product and how they fit.
- Agents: instructions, skills, memory, schedules, budgets and handing an agent over.
- Projects and tasks: repositories, knowledge and Jira.
- Teams: a lead that splits a task between its members.
- Approvals and control: policies, approvals and limits.
- Where agents run: computers, the worker and the server seat.
- Integrations: GitHub, GitLab, Jira and MCP servers.
- Administration: people, the license, logs and updates.
- OPERATIONS.md: HTTPS, backups, updates and troubleshooting.