
Administration
This page is for the admins of an Agentome installation: the people who invite colleagues, connect systems, add the license key, keep the server up to date and find out what went wrong. Most of it happens on the Admin page; the rest is a command on the server.
- The Admin page
- People
- License
- Version and updates
- Backups and restore
- A forgotten password
- HTTPS
- Logs and traces
- API tokens and managing Agentome from Claude Code or Codex
The Admin page
Open Admin in the sidebar. Its pages are in three groups.
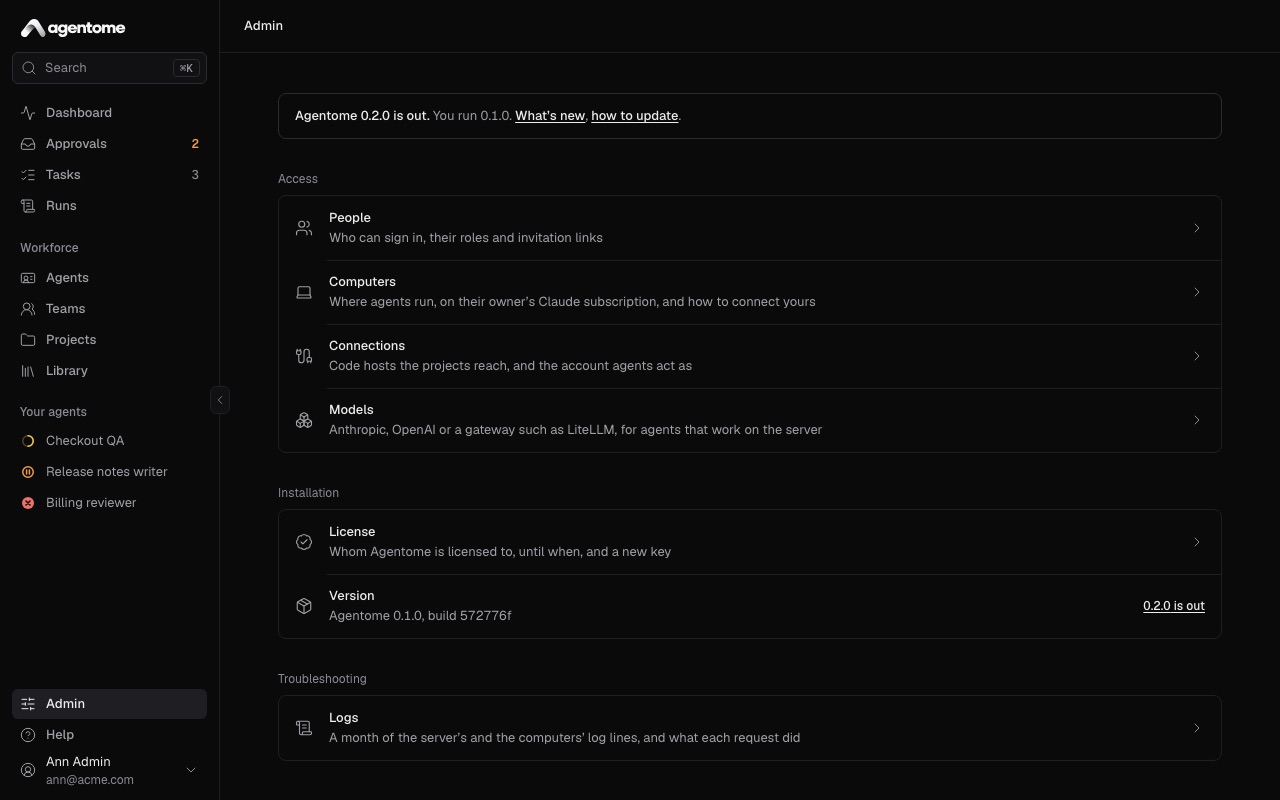
| Group | Page | What it is for |
|---|---|---|
| Access | People | Who can sign in, their roles and invitation links |
| Access | Computers | The computers agents run on, and how to connect one |
| Access | Connections | GitLab, GitHub and Jira for each project, and the account agents act as |
| Access | Models | Anthropic, OpenAI or a gateway such as LiteLLM, for agents on the server |
| Installation | License | Free or Enterprise, the installation ID, and a new key |
| Installation | Version | The version the server runs, and whether a newer one is out |
| Troubleshooting | Logs | A month of the server's and the computers' log lines, and traces |
Computers are covered in Computers; connections and models in Integrations.
People
Admin → People lists everyone who can sign in, with their email, role and computer, and the invitations that are not used yet.
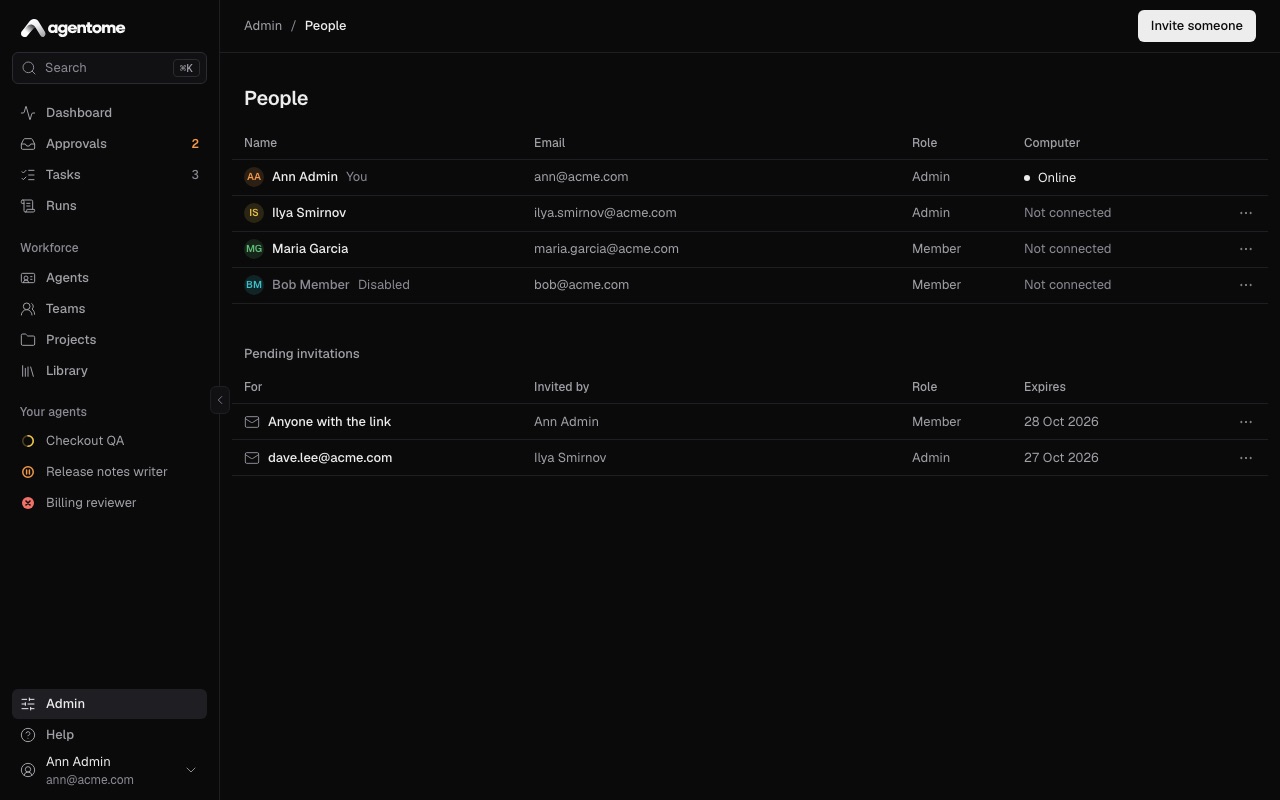
There are two roles:
- Member: works with agents, tasks and projects.
- Admin: also manages people and settings in Admin.
Invite someone
Agentome sends no mail. You create a link and pass it on yourself.
- Select Invite someone.
- Pick the Role: Member or Admin.
- Select Create link.
- Select Copy link and send the link to the person, by a channel only they read.
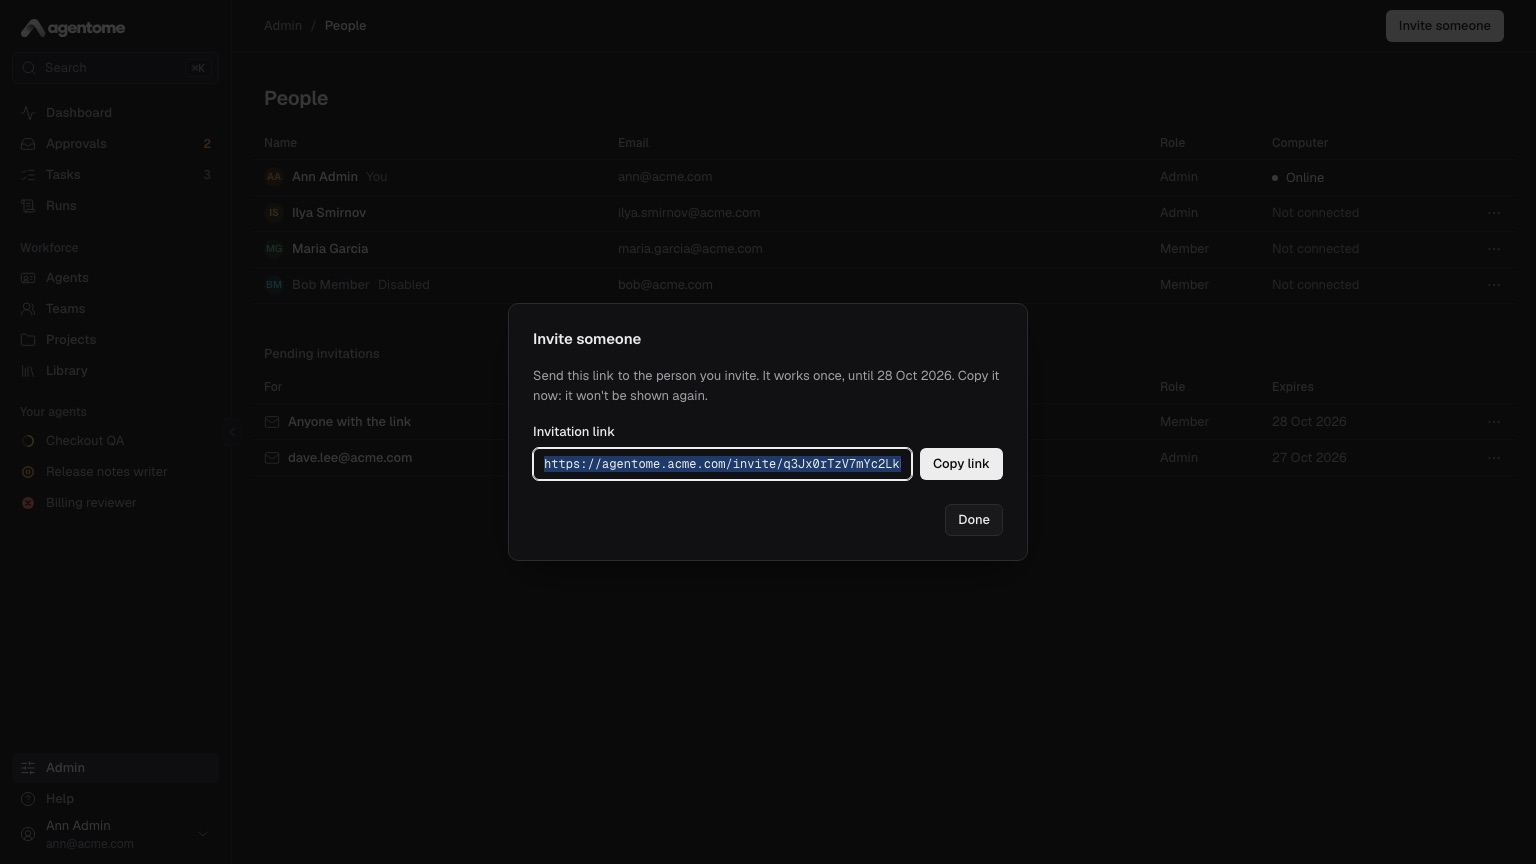
The link works once and expires in 7 days. It is shown only once. The person opens it, gives their name, email and a password of at least 12 characters, and is in. Until then the invitation is under Pending invitations, where its menu has Revoke: the link stops working at once.
With Keycloak sign-in, people do not need an invitation: their first sign-in makes them a member (see Sign-in with Keycloak).
Disable a person
Open the person's menu and select Disable. Then:
- they are signed out everywhere and cannot sign in;
- a run going on their computer stops, and their computers take no more runs;
- invitations they created and nobody used stop working.
Their agents are not touched: transfer them to someone else (below). Select Enable in the same menu to let the person back in. You cannot disable yourself, so the installation always keeps an admin who can sign in.
Transfer a leaving person's agents
When someone leaves, their agents stay with the company.
- Open the person's menu in Admin → People and select Transfer agents.
- Pick the New owner.
- Select Transfer.
Every agent the person owns goes to the new owner for good, with its memory, history and teams. Its runs then go to the new owner's computer, and its approvals to them. An agent the person had only for a time goes back to its owner. Sign-ins to MCP servers are personal: the new owner signs in again to the ones the agents use.
To hand one agent over, for good or until a date, use the agent's own page; see Agents.
License
Agentome is free to install and use with no time limit. A license key makes it Enterprise.
| Free | Enterprise | |
|---|---|---|
| Active agents | up to 5 | as many as you need |
| Teams | one | any, nested |
| Where agents work | people's computers | their computers and the server |
| Monthly budgets | yes | |
| Agent quality | yes | |
| Sign-in with Keycloak | yes |
Everything else, such as GitLab, GitHub, Jira, the MCP library, approvals, run limits and the cost of every run, is in both.
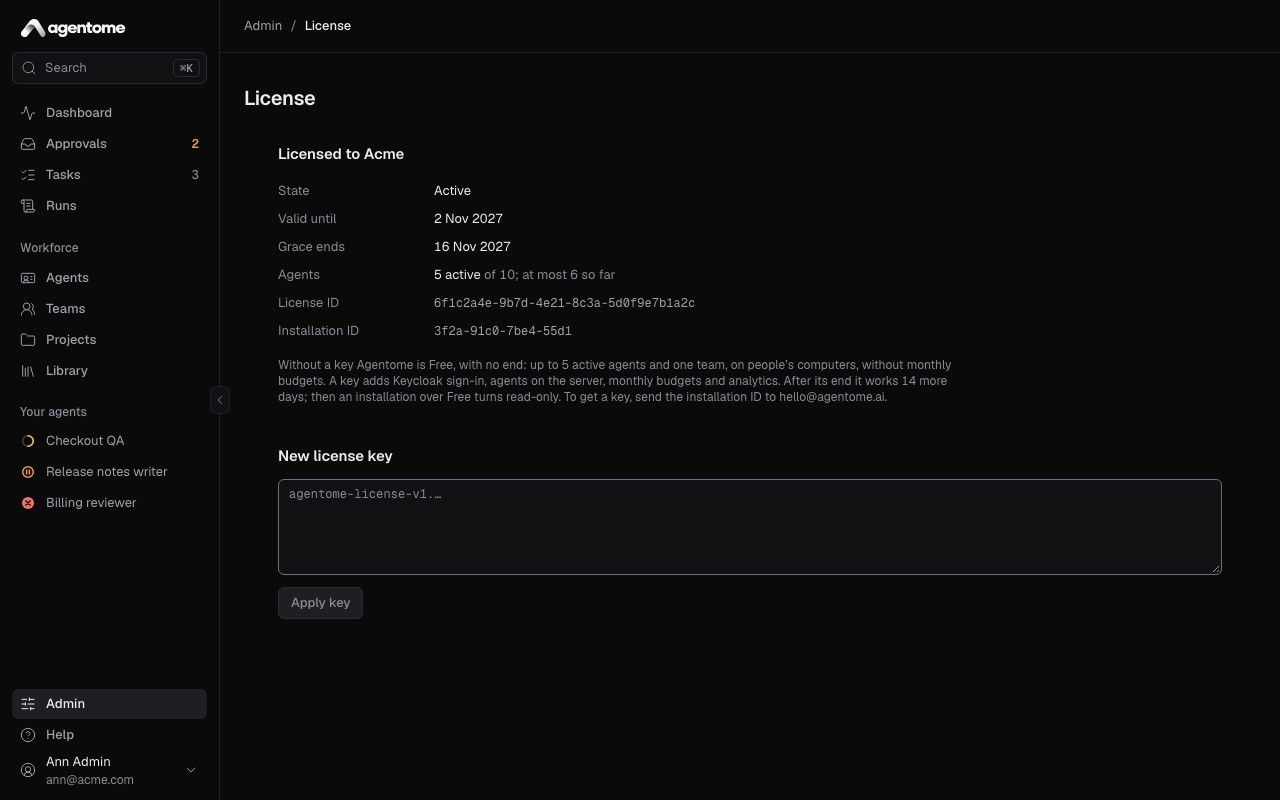
Admin → License shows:
- State: Free, Active, in its grace, or read-only;
- Valid until and, after the end, Grace ends;
- Agents: how many are active, against the plan;
- Installation ID: the ID a key can be made out to.
Add a key
- Copy the Installation ID and send it to hello@agentome.ai to get a key, or a 30-day trial key.
- Paste the key in New license key.
- Select Apply key.
The key works at once, without a restart. It is checked on the server, offline: Agentome never reports home.
If you have more active agents than the key's plan, nothing stops: the page says by how many, and the next license counts them.
When a key ends
After a key's last day, Agentome works 14 more days, with a line at the top of every page that says so. Then:
- an installation within Free goes on as Free;
- an installation over Free turns read-only: everyone can sign in and look at everything, but nothing runs or changes. Runs already going finish.
Over Free means more than five active agents, more than one team, agents on the server, or monthly budgets. Admin → License lists which. To get out of read-only, apply a new key, or cut back to Free: archive agents, remove teams, move agents to their owners' computers, take monthly budgets off. Agentome works again at once.
See also License in the operator docs.
Version and updates
Admin → Installation shows Version, the version the server runs and its build, such as "Agentome 0.2.0, build 572776f". Name it when you ask for help.
When a newer release is out, the row says so, and a line at the top of Admin links to what is new and to how to update. Otherwise the row says Up to date.
The check is made by your browser, which asks GitHub for the latest release at most once a day; the
server itself asks nobody. To turn the check off, for an installation whose people must not reach
outside, set AGENTOME_UPDATE_CHECK=false (see Version).
To update:
- Take a backup (see below).
- Set
AGENTOME_VERSIONto the new version in.env, or run the install script again. - Run
docker compose pull && docker compose up -d.
The server applies its database migrations on start, and your data stays in its volumes. After an update, Admin → Computers says which computers have an out-of-date worker, with the command to update it. Details, and how to roll back, are in Updating and Rolling back.
Backups and restore
A backup is one .tar.gz with the database. The server's secret key is not in it, so that a backup
that leaked opens none of the integrations' tokens: keep a copy of the key once, apart from the
backups, in a password manager or a vault (docker compose exec -T app cat /data/secrets/secret.key).
A restore on another machine needs it in place first.
Take one, while the server runs:
(umask 077; docker compose exec -T app agentome backup > agentome-$(date +%F).tar.gz)Restore one, with the server stopped:
docker compose stop app
docker compose run --rm -T app agentome restore < agentome-2026-10-21.tar.gz
docker compose up -dRestore with the version that made the backup, or a newer one. The same commands move an installation to another machine, with the key put there first. Encrypting backups, scheduling them and what can go wrong are in Backing up and restoring.
A forgotten password
Agentome sends no mail, so the sign-in page has no "forgot password". Whoever runs the server makes a link for the person:
docker compose exec app agentome reset-password ann@acme.comPass the link to the person as you would a password. It works once, for an hour, and sets a new password. The new password signs the person out everywhere and revokes their API tokens; their computers stay connected.
This is also the way back in for the only admin. It does not let a disabled person in, and it does not apply to an account that signs in only through Keycloak. See A forgotten password.
HTTPS
Give Agentome an HTTPS address before you connect computers or turn on notifications:
- a computer downloads its worker from the server, which over plain HTTP anyone on the way could replace;
- phones and browsers deliver notifications only over HTTPS.
The installation's proxy profile adds Caddy, which serves HTTPS in one of two ways:
- With a domain: a certificate from Let's Encrypt, renewed by itself. See HTTPS with the proxy profile.
- On a local network without a domain: a certificate for the machine's IP address from Caddy's own authority, which each phone and computer trusts once. See HTTPS on a local network.
If GitLab, Jira or an MCP server inside the company carries a certificate of the company's own authority, give the server that root certificate; see A company certificate authority.
Logs and traces
Admin → Logs shows the log lines of the server and of the connected computers from the last month, newest first.
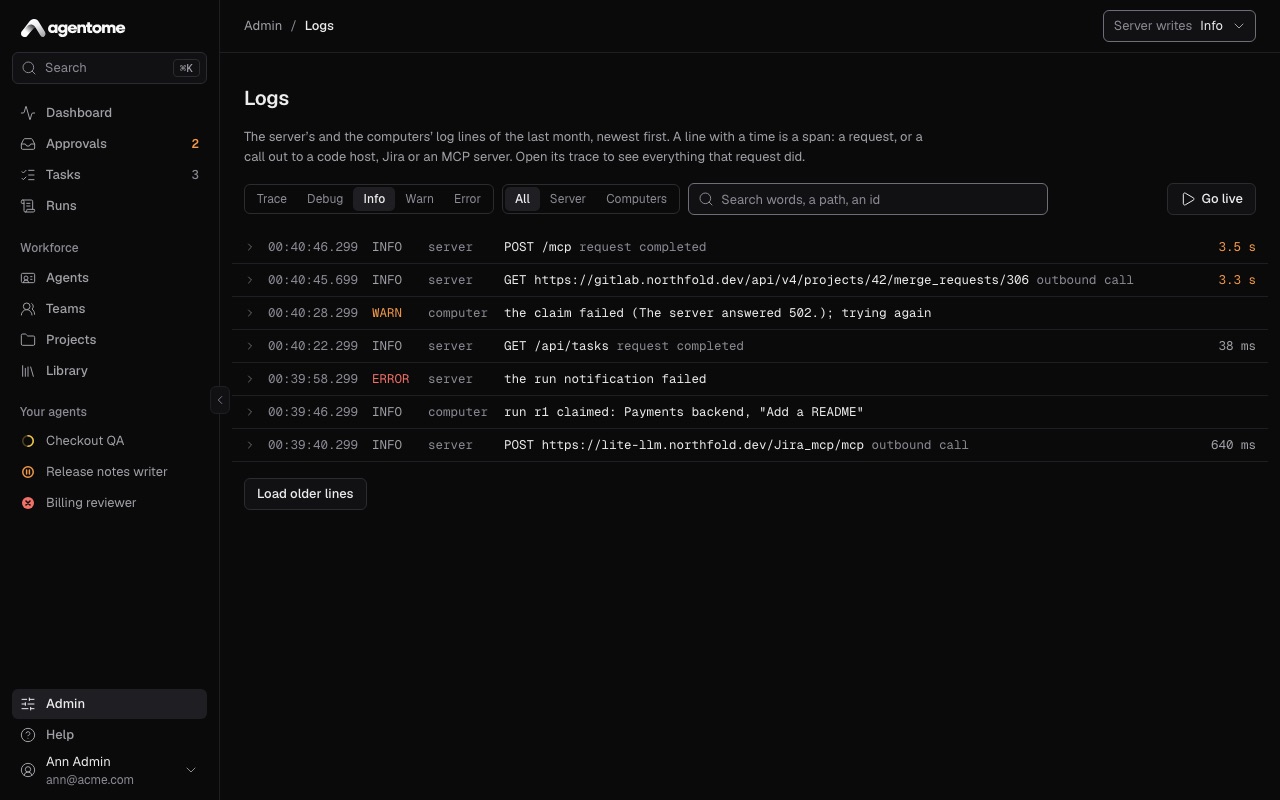
To find what you need:
- Pick the lowest level to show: trace, debug, info, warn or error.
- Pick the source: All, Server or Computers.
- Search for words, a path or an ID.
- Select Go live to follow new lines as they come.
Select a line to see its details. A line with a duration is a span: a request to the server, or a call out to a code host, Jira or an MCP server. From a line you can open:
- Trace and its ID: everything that one request did, drawn as a waterfall;
- Run and its ID: the run it belongs to;
- Every line of this run: the log filtered to that run.
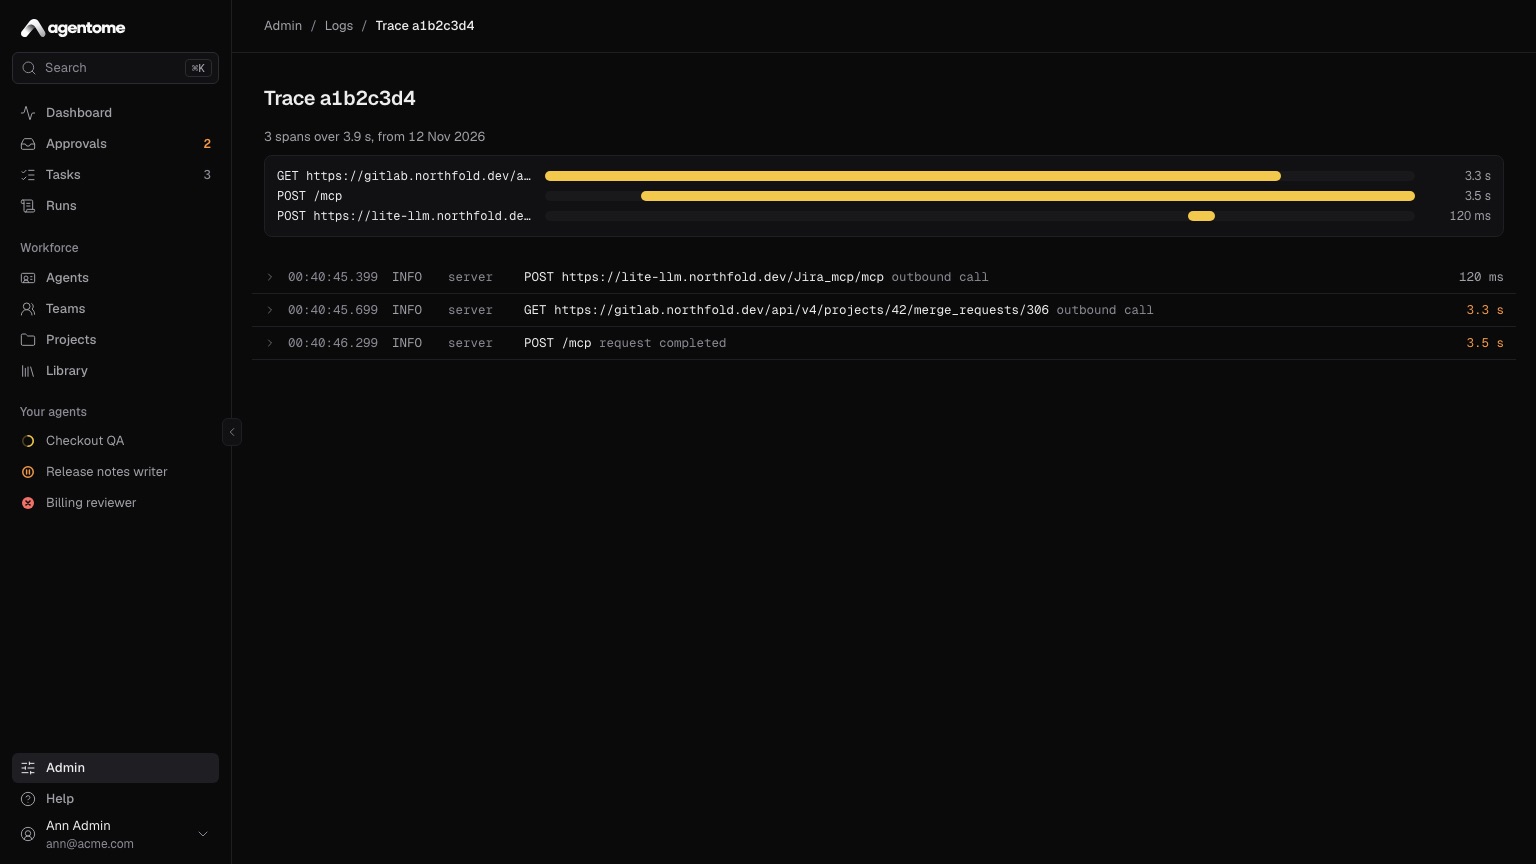
A run's page has a Logs link that opens the same filter.
Server writes, at the top right, sets how much the server logs, from trace (everything, for
a short look) to error (failures only). info is the usual. Lines are kept for 30 days;
AGENTOME_LOG_RETENTION_DAYS changes that (see
Server settings).
When the web app itself does not open, look at the server's own log with
docker compose logs -f app; see Troubleshooting.
API tokens and managing Agentome from Claude Code or Codex
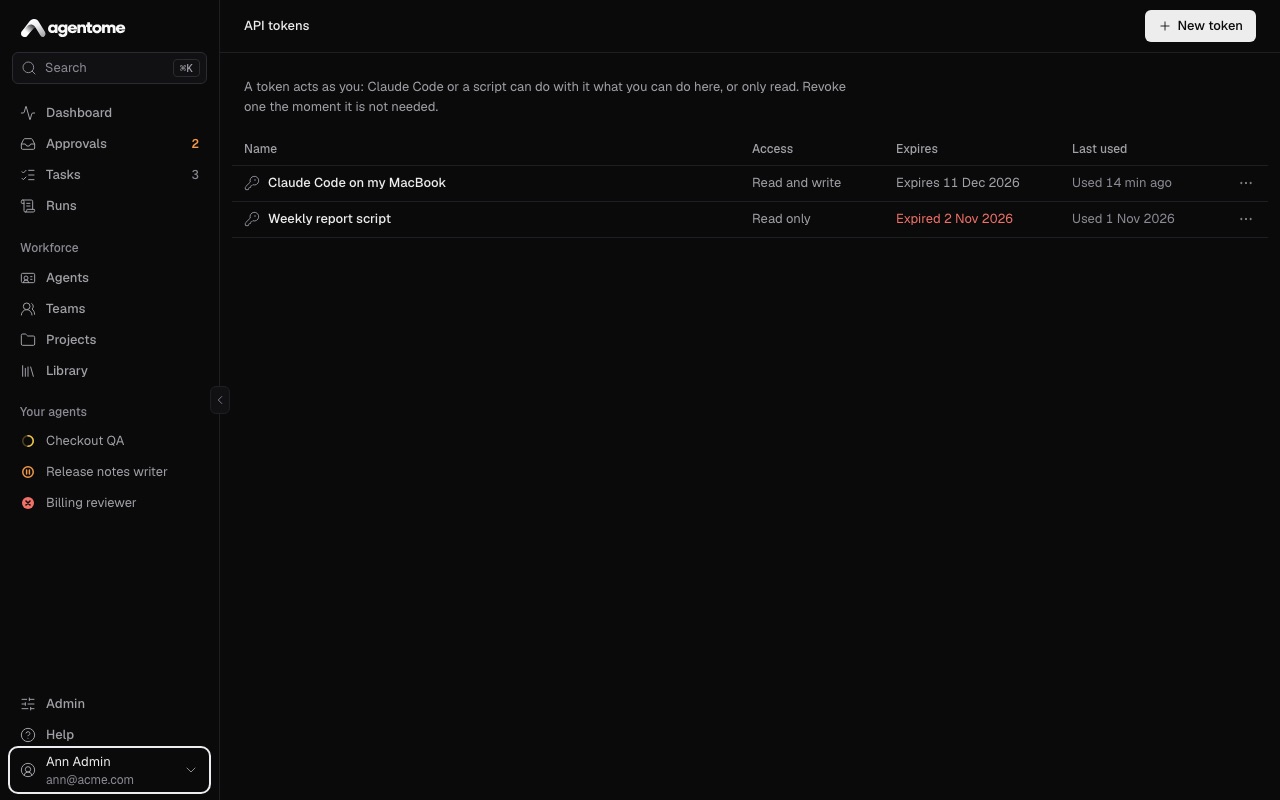
A personal API token acts as you. With it, Claude Code, Codex or a script can do what you can do in the web app, or only read. Every person makes their own tokens; admins and members alike.
Make a token
- Open API tokens: on a computer, from the menu under your name at the bottom of the sidebar; on a phone, from More.
- Select New token and give it a name.
- Pick when it Expires: 7, 30 or 90 days, 1 year, a custom number of days, or No expiry.
- Pick the Access:
- Read and write: everything you can do here.
- Read only: sees everything, changes nothing.
- Select Create token.
- Copy the token at once: it is shown only once.
Tokens are made and revoked only in the browser, so a token that leaks cannot make more of itself. Revoke one with Revoke in its menu the moment it is not needed. Setting a new password with a reset link revokes all of a person's tokens.
Connect Claude Code
The dialog that shows the new token also gives the command to connect Claude Code. Run it once:
claude mcp add --transport http agentome https://<server>/mcp/manage --header "Authorization: Bearer <token>"The command keeps the token in your shell history and in Claude Code's own configuration. If either leaks, revoke the token.
Connect Codex
Codex reads the token from an environment variable, so it stays out of Codex's configuration. Add the server once:
codex mcp add agentome --url https://<server>/mcp/manage --bearer-token-env-var AGENTOME_TOKENThen start Codex where AGENTOME_TOKEN holds the token, for example after
export AGENTOME_TOKEN=<token> in your shell profile. codex mcp list shows the server.
Connect Claude Desktop or another client
A client that starts a program rather than calling an address with a header, such as Claude
Desktop, runs agentome mcp from npm, which passes its messages on to your server. It needs
Node.js 20 or later. In Claude Desktop, open Settings, Developer, Edit Config, and add
the server to claude_desktop_config.json:
{
  "mcpServers": {
    "agentome": {
      "command": "npx",
      "args": ["-y", "agentome", "mcp"],
      "env": {
        "AGENTOME_URL": "https://<server>",
        "AGENTOME_TOKEN": "<token>"
      }
    }
  }
}Restart Claude Desktop. The token is kept in that file, so revoke it if the file leaks. Agentome is
also listed in the
MCP Registry
as io.github.agentome-ai/agentome, for clients that install servers from there. To drive Agentome
from n8n workflows, see n8n.
What it can do
Claude Code or Codex can then manage Agentome for you, in your words: list and create agents, change their instructions, tool policies and budgets, hand agents over, create and run tasks, read runs and their transcripts, approve, deny and answer requests, manage skills, teams and project knowledge, read logs and the license. Every action is yours, with your permissions.
With a Read only token, they get only the tools that read.
Some things stay in the web app on purpose, because they carry secrets: adding or changing an MCP server, adding a model connection's key, and making tokens.